You can use ScopeStack to build up a complete set of Terms and Conditions!
Creating Terms and Conditions
Create Terms and Conditions in Settings to be added to every project. Creating a new Term will not affect any previously created projects.
To create Terms and Conditions, go to Settings > Content > Terms and Conditions.

Here, you can see a list of the full default Terms and Conditions in your account. The terms will be made available in the order shown. You may drag and drop the terms to put them in the proper order for your document. To create a new item, click + Terms and Conditions.
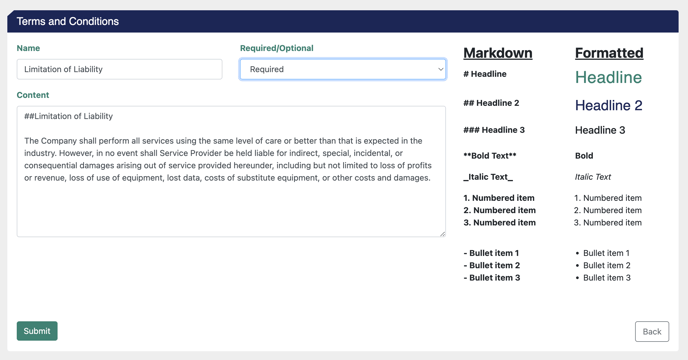
Here, you can give your term a name and add content. If necessary, the name can be used within your document template to target a specific location for the term.
Inserting Plain Text vs. Formatted Text
Inserting Terms and Conditions into your document can be done in a couple of ways, but both ways require knowledge of our use of Merge Fields.
You can insert Terms and Conditions into a document in either plain text or formatted text.
-
Plain Text insertion will work like any other "each" item and can be accessed via the appropriate merge data. Use the content key under each terms_and_conditions item to access the plain text version of the Term content.
-
Formatted Text insertion will allow you to insert terms and conditions in a similar method to text blocks, overriding any formatting applied to the merge field but allow you to access markdown. Use the formatted_content key under each terms_and_conditions item to access the formatted text version of the Term content.
You can see an example term here.
For example, the double ampersand before the words "Limitation of Liability" above will make those words in the H2 style defined in the document template. With the plain text method, terms would be inserted with asterisks in the text for the term, and the platform would ignore their markdown implication.
Optional vs. Required
Specific terms can be added or removed from a project. The Required/Optional selection influces that default behavior. Required terms will be added to a project included in the output, while optional terms will be added to a project in the excluded state, meaning they will not be added to any resulting documentation. A user can choose to "include" the term on a per project basis.
When you're ready, press Submit to save.
Terms and Conditions in a Project
Within a project, you can see all of the Terms and Conditions present on that Project. These are generally the terms present when a user created the project.
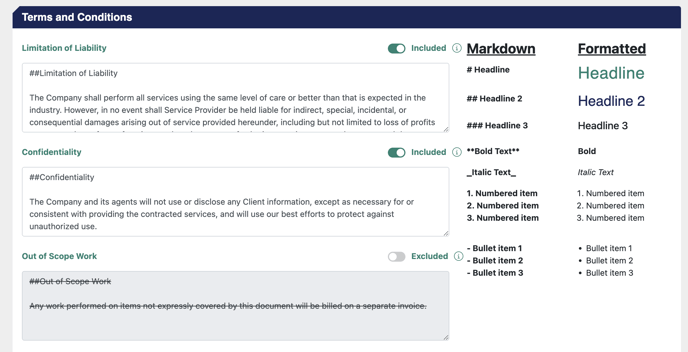
With appropriate permission, you can override any term on a per-project basis. You can also include or exclude a whole term on a per-project basis. Note that any terms defined as optional in Settings will be excluded by default.
Client, Business Unit, and Partner-Specific Term Overrides
On a per-Client, per-Business Unit, and per-Partner basis, you can create specific term language or completely remove a term from your work statement.
Order of Application
Terms are applied to projects in the following order:
-
The standard terms for the account are applied first
-
Any updates for the Business Unit are applied next
-
Special conditions related to the Customer (either a Client or a Partnership) are applied last.
Accessing areas in Settings
-
For Clients, go to Settings > Users & Groups > Clients. Click on the client you want to modify the term or terms for. If the Client isn't on the list, this likely means you have not created a project for this client before. You can create a client by clicking + Add Client. If you are syncing opportunities from a CRM tool, you will need to ensure that any client you create is input into ScopeStack exactly like the client's name is in the CRM tool. The surefire way to do this would be to create a project from a client's CRM opportunity.
-
For Business Units, go to Settings > Users & Groups > Business Units
-
For Partnerships, go to Account > Partnerships (this is a paid feature and may not be available on your account).
Modifying Terms
-
Once you can access the specific element you want to modify, click on the Terms & Conditions tab.
-
Here, the platform will present a complete list of the terms and conditions present. Unless overwritten, these will be the list of terms and conditions present on the account.
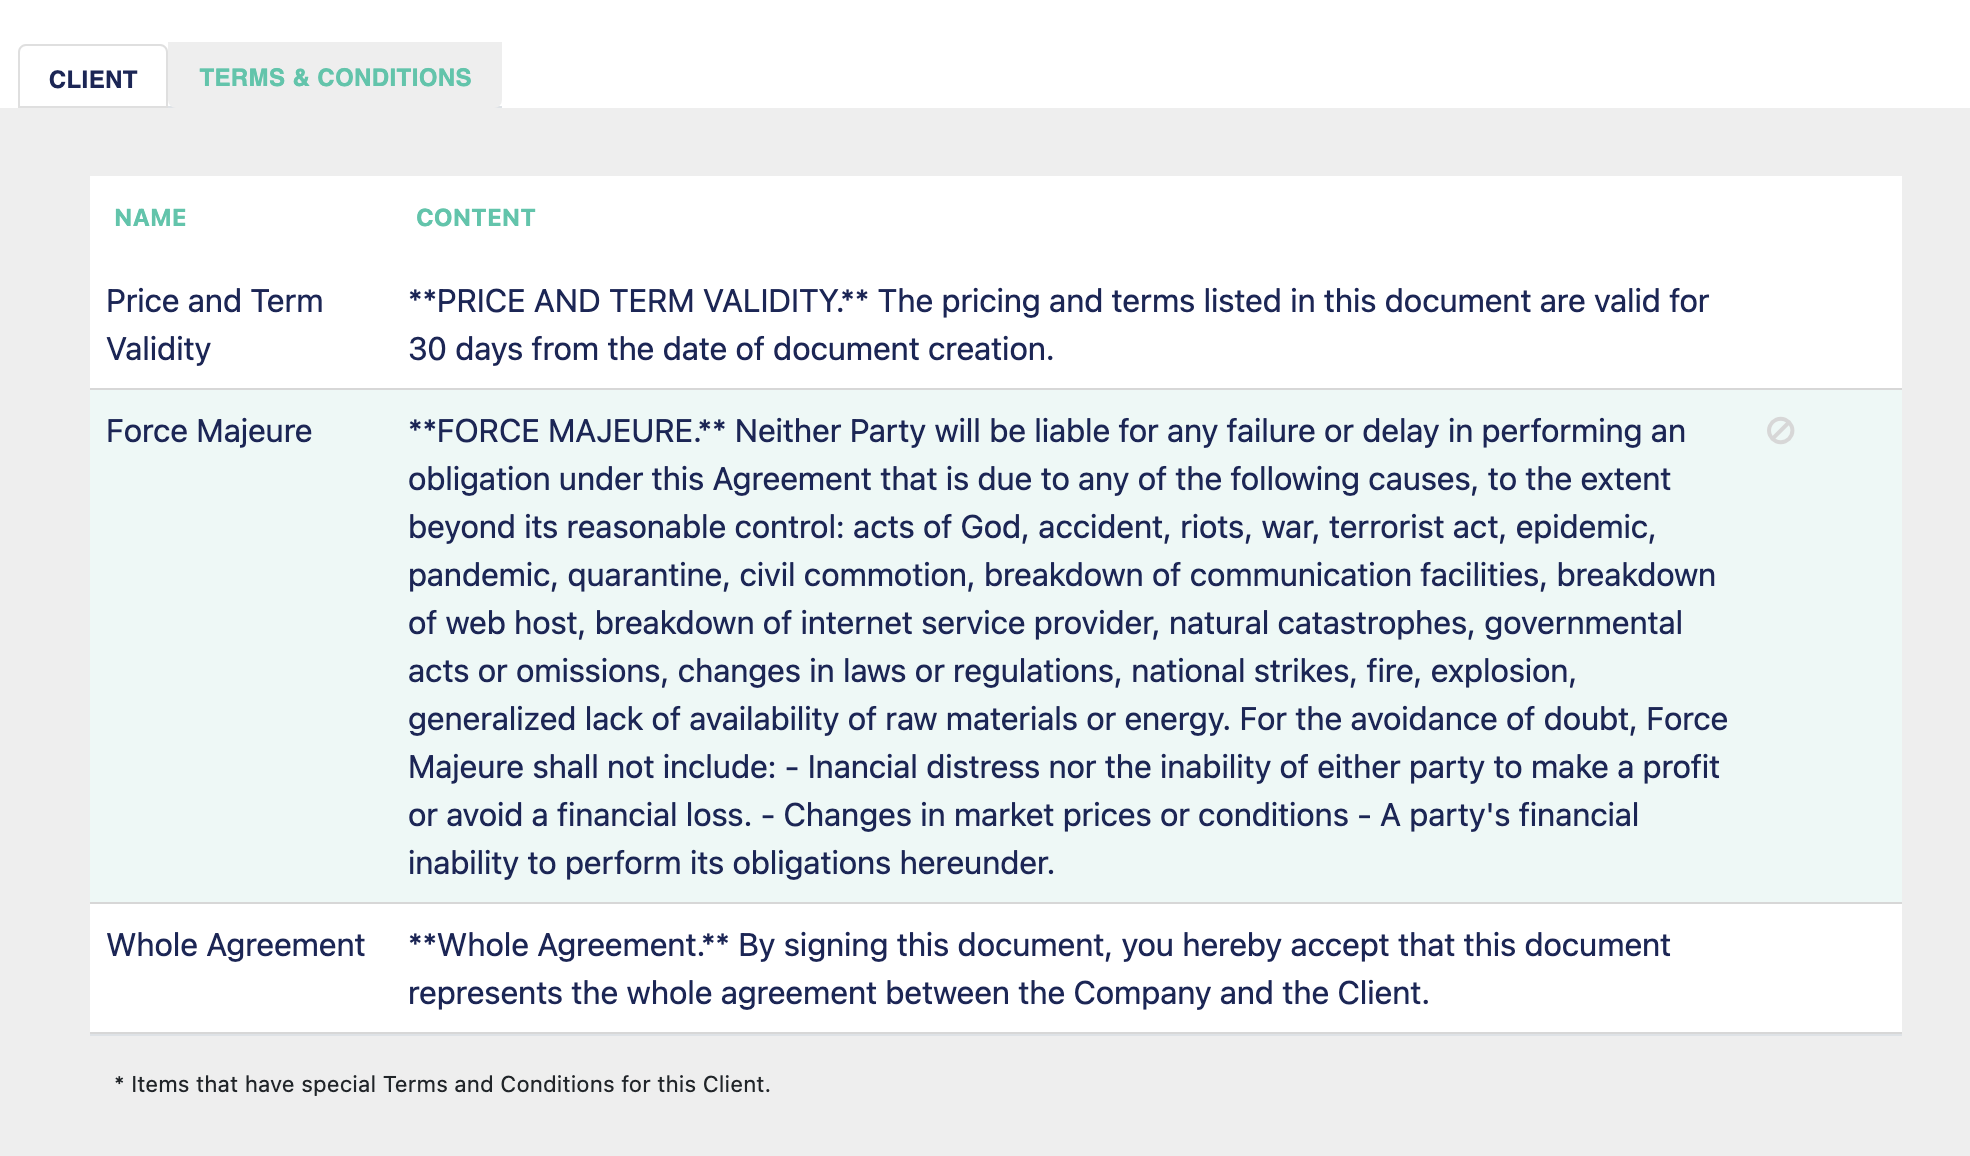
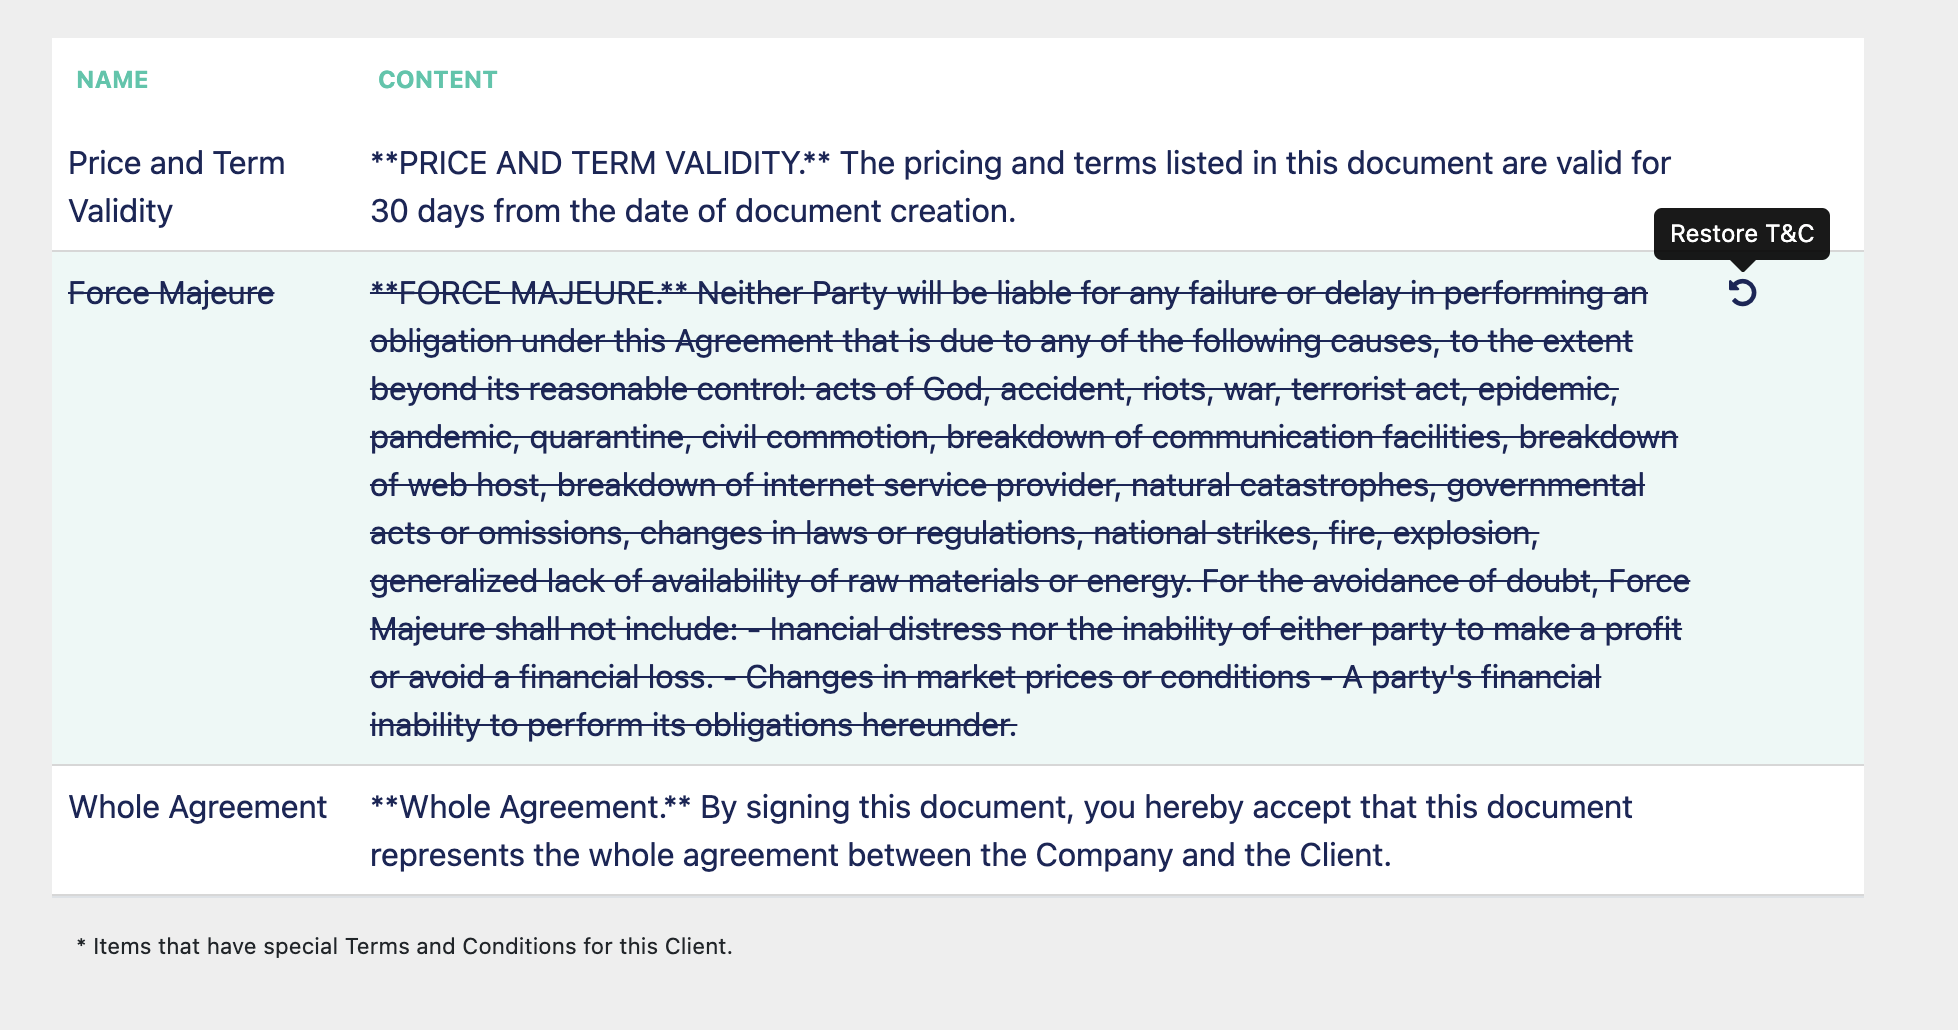
In the above example, we can modify the Force Majeure term by either clicking on it or clicking the Skip button.
-
Clicking on it opens up a text box where we can modify the contents of that term for this particular Business Unit, Client, or Partnership.
-
Clicking the Skip T&C button will skip that term when terms are added to a project.
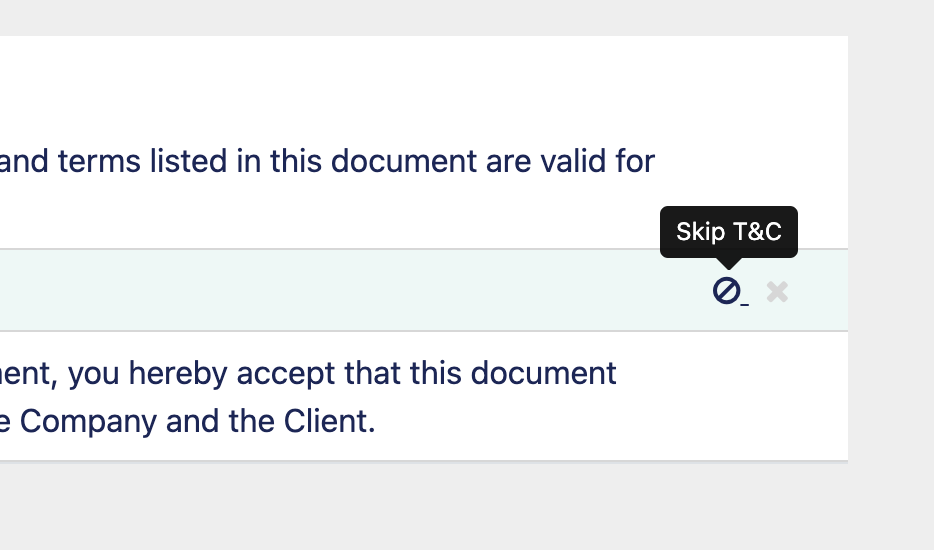
Once skipped, you can restore the Term at any time by clicking the Restore T&C icon.
After you are finished, you can press Submit. Press Back at any time to cancel.
If you ever want to clear out any term override you've created, you can do so by hovering over the override and clicking the context menu "X" item that appears.

This will revert that term to the standard version of the term for the whole account.