Before you get started, please ensure you have appropriate permission in Salesforce to set up this Connected App.
First, Create a Connected App in Salesforce
Click
Click the gear icon in the top right corner, and then select Setup.
 In the top right corner of the frame, select to create a New Connected App.
 Select "Create a Connected App".
Next, Configure your connected app in Salesforce
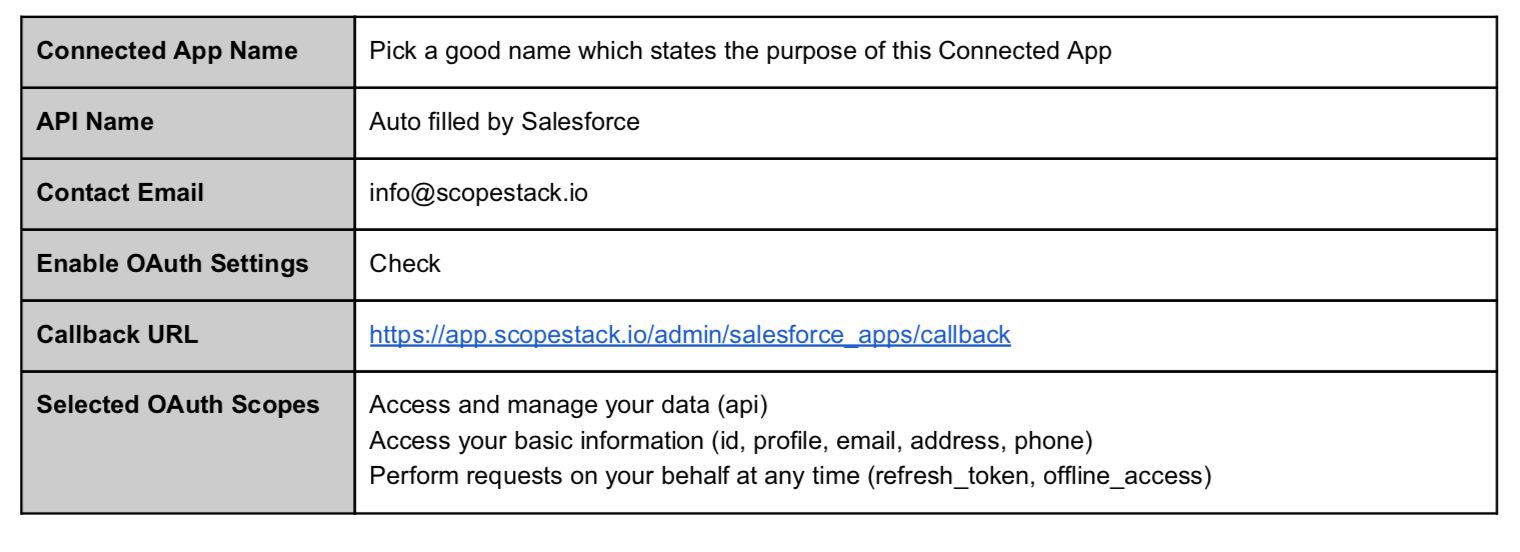
Initially, you will need to complete:
-
Connected App Name: The internal name for the application.
-
API Name: This is autogenerated; it's the internal name for the Connected App in your instance
-
Contact Email: You can set this to info@scopestack.io
-
In the API (Enable OAuth Settings) section, check the Enable OAuth Settings checkbox to reveal additional options. Now you can select OAuth Scopes.
-
Fill in the Callback URL for ScopeStack: https://app.scopestack.io/admin/salesforce_apps/callback
-
Under Available OAuth Scopes, you can select Full access.
-
Full access (full)
-
Manage User Data vis APIs (api)
-
Perform Requests at any time (refresh_token and offline_access)
-
- Note if PKCE is required. If it is, you will need to select so in the ScopeStack setup.
Click Save after entering the configuration as described above.
Copy Consumer Key and Secret for use in ScopeStack
You will be redirected to a page where you can view the app information. To view your Consumer Key and Secret, look under the API (Enable OAuth Settings) section.
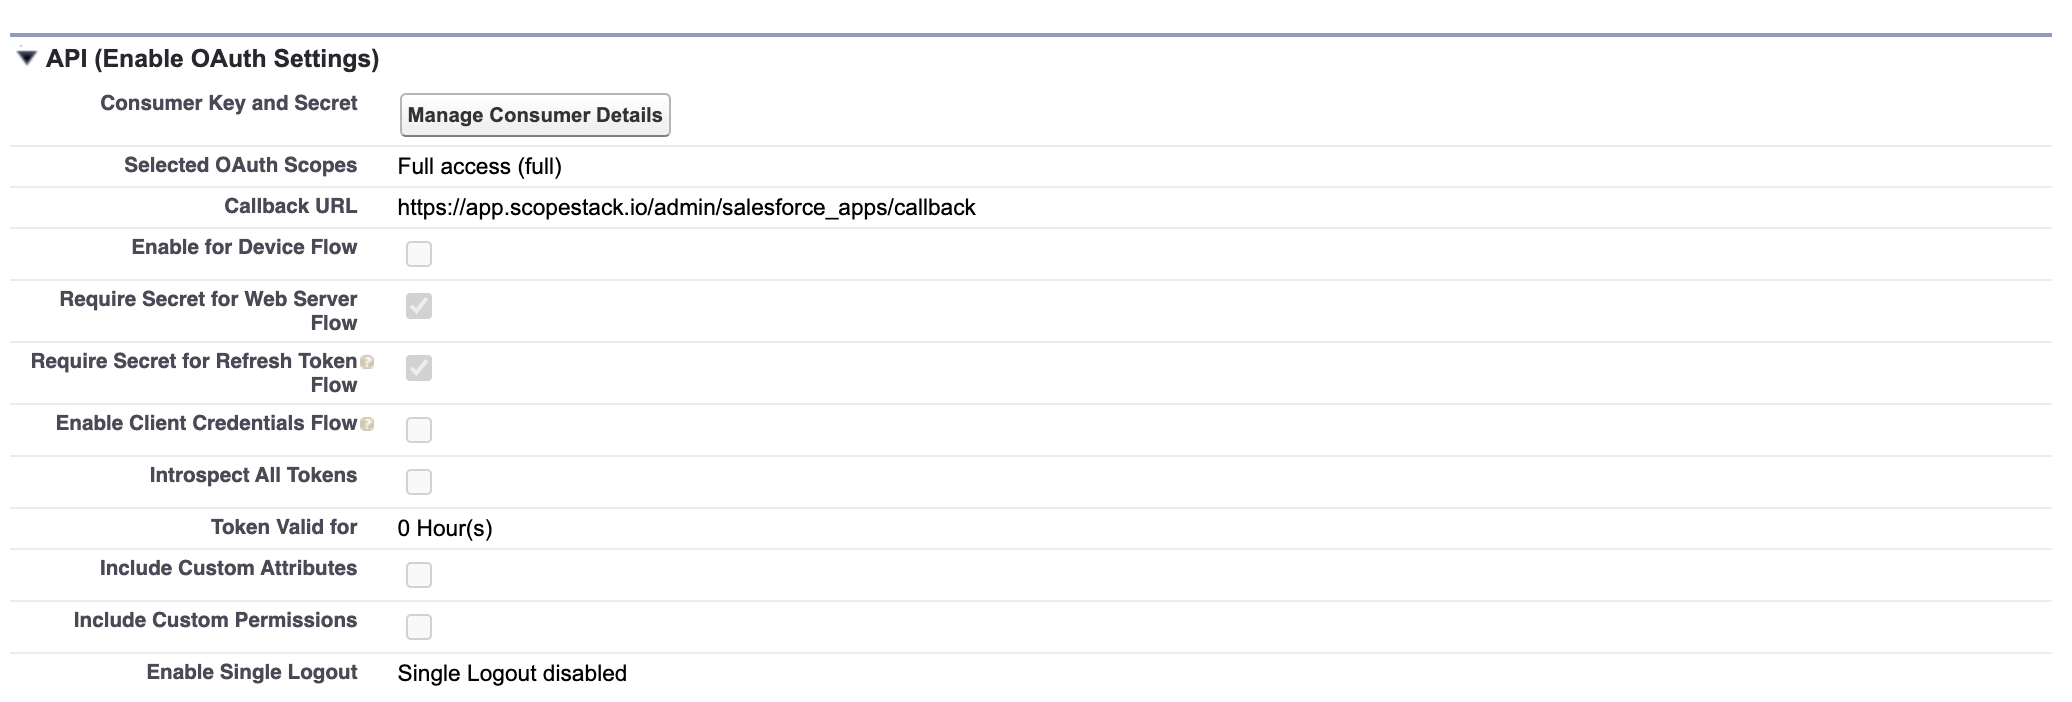
Click the Manage Consumer Details button to view the Consumer Key and Secret.
Configure in ScopeStack
To configure the app, navigate to Settings > Connected Apps and click on the Salesforce tile. 
Next, click the Add Integration button in the top right corner of the page.

You can now enter your Salesforce integration information that you created in the Salesforce application.

Enter your Salesforce OAuth Host, Consumer Key, and Consumer Secret in the appropriate boxes.
- The Scalesforce OAuth Host is typically something like https://login.salesforce.com. Learn more here.
-
Your Salesforce Host will typically follow the pattern of https://something.my.salesforce.com
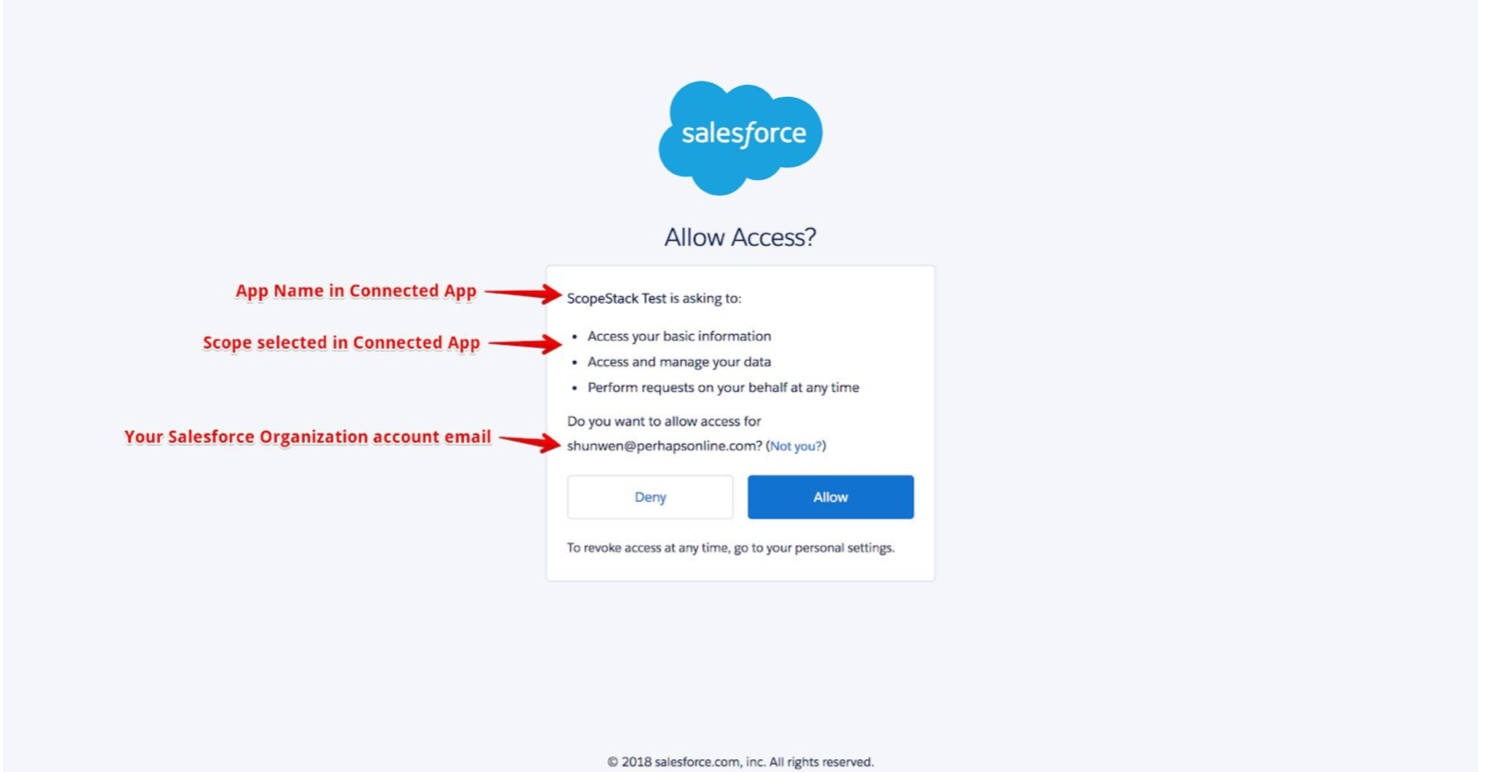
Click Continue
Allow Access
Finalizing the Configuration
After the application is configured, you can customize the Opportunity Stages you would like synced in and select if you want to Skip the revenue sync that occurs when the project is submitted for approval under Additional Features.
