Surveys allow you to ask questions of your pre-sales engineers or directly to your clients that give feedback, allowing you to automate the creation of recommendations about what services should be used in a project.
You can check out a quick overview of the feature here:
Getting access to Surveys
The Surveys feature is an add-on and is included by default in most advanced plans. If you don't have access to this feature and would like to learn more about how to get it, please contact our sales team at sales@scopestack.io.
How to create a Survey
The first step in the process is creating a survey to which individuals can respond. To do that, let's head over to settings:
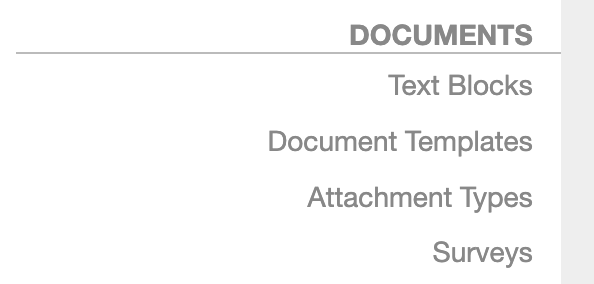
Next, you can find Surveys under the Documents heading in the left menu.
Next, you will see the list of Surveys in your account. Below the listing, you can click + Add Survey to get started.
Define High-level Information
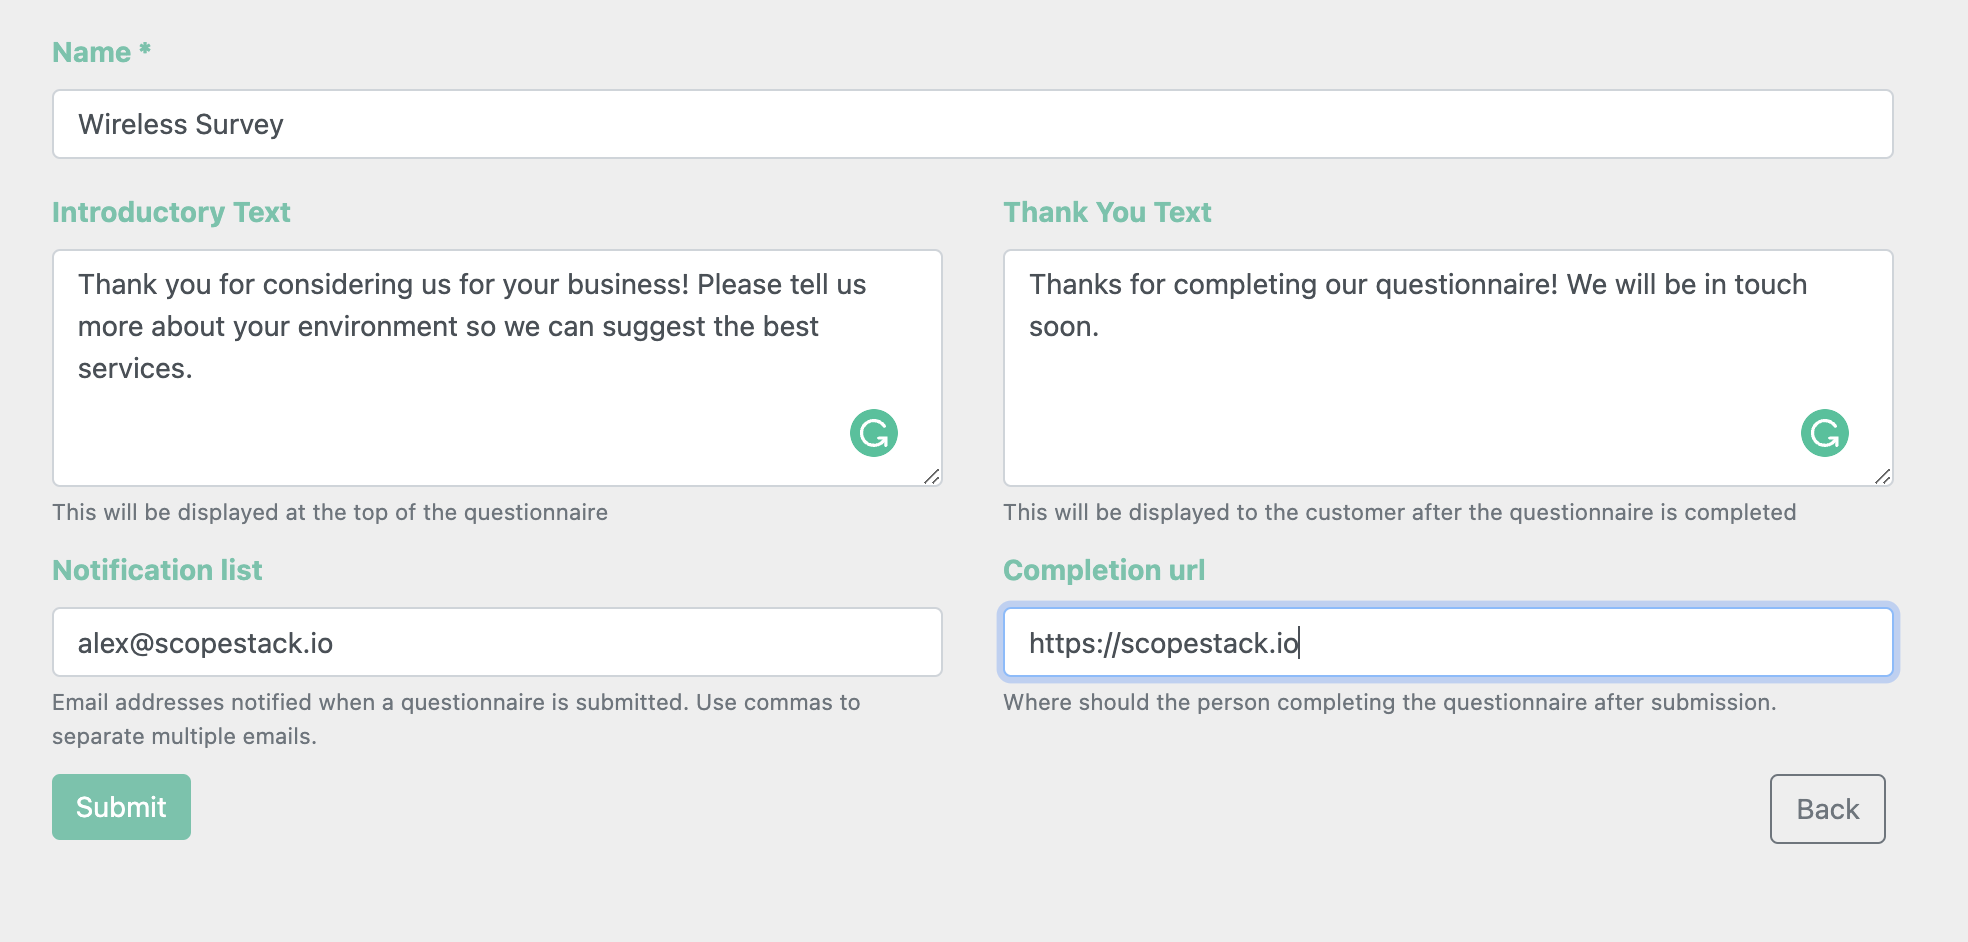
The first step is to define some high-level information about your Survey. Here you can give your Survey a meaningful name and some text to be displayed at the point of submission. You can define who the platform should notify when a user completes a Survey and the URL the platform sends the user who completed the Survey after submission.
When creating or editing a Survey, a user can assign that Survey to one of more teams. This brings an added benefit on the Project page when a user applies filter results based on Team(s).
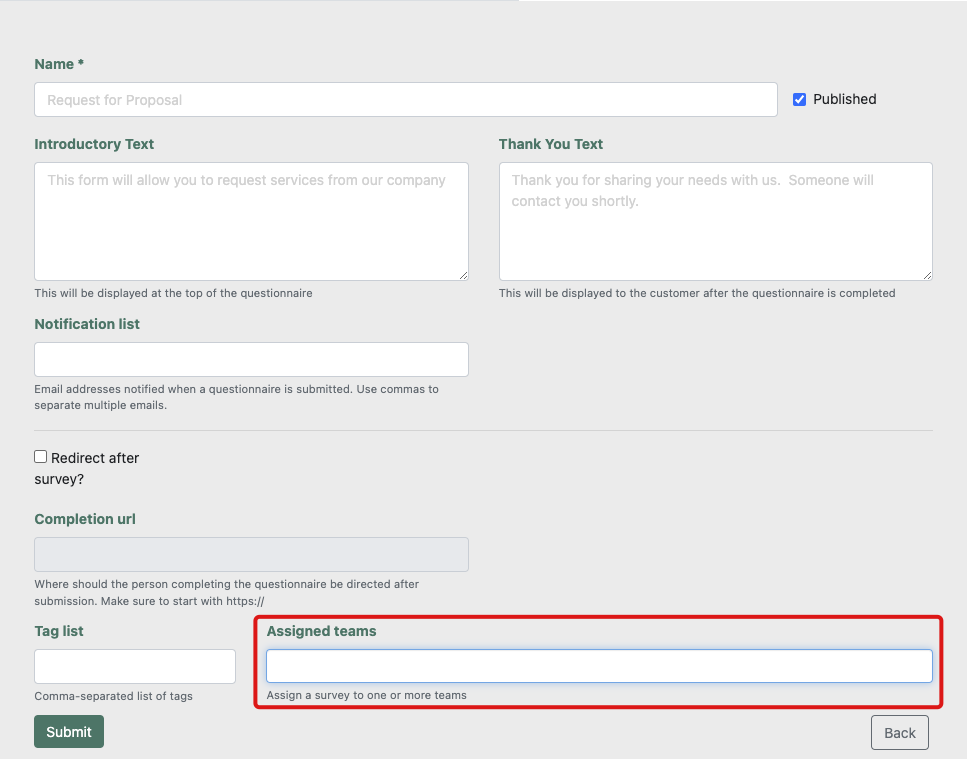
Note: Only "Published" Surveys will be available to fill out after creating your Survey.
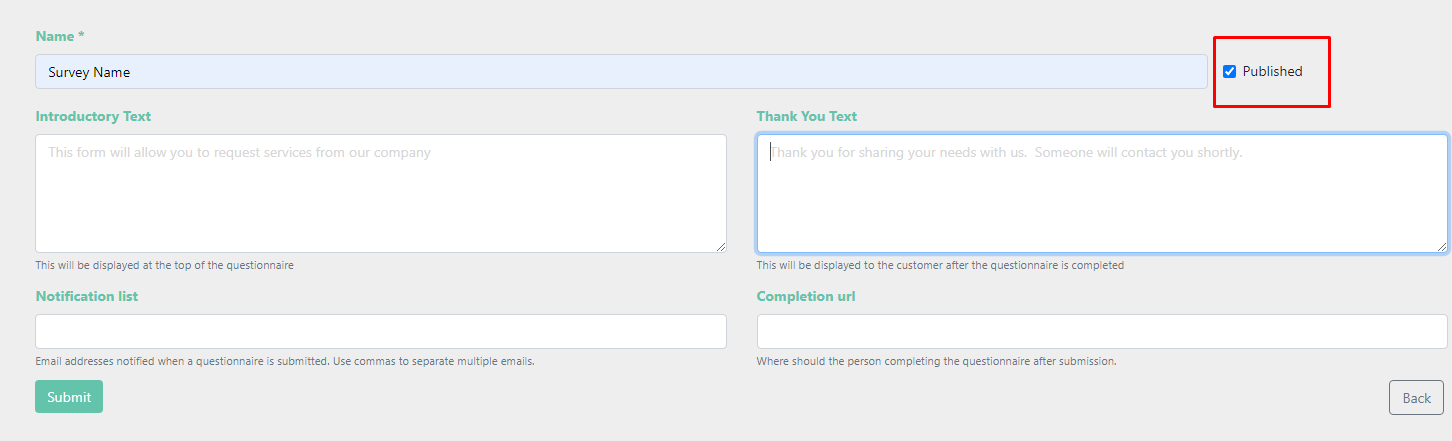
When you're ready, press Submit. After submitting, you will see additional tabs available to complete. These tabs flow from left to right in the suggested order of their completion.

Add Questions
Next, let's set up some Questions.

To start, click + Add Question.
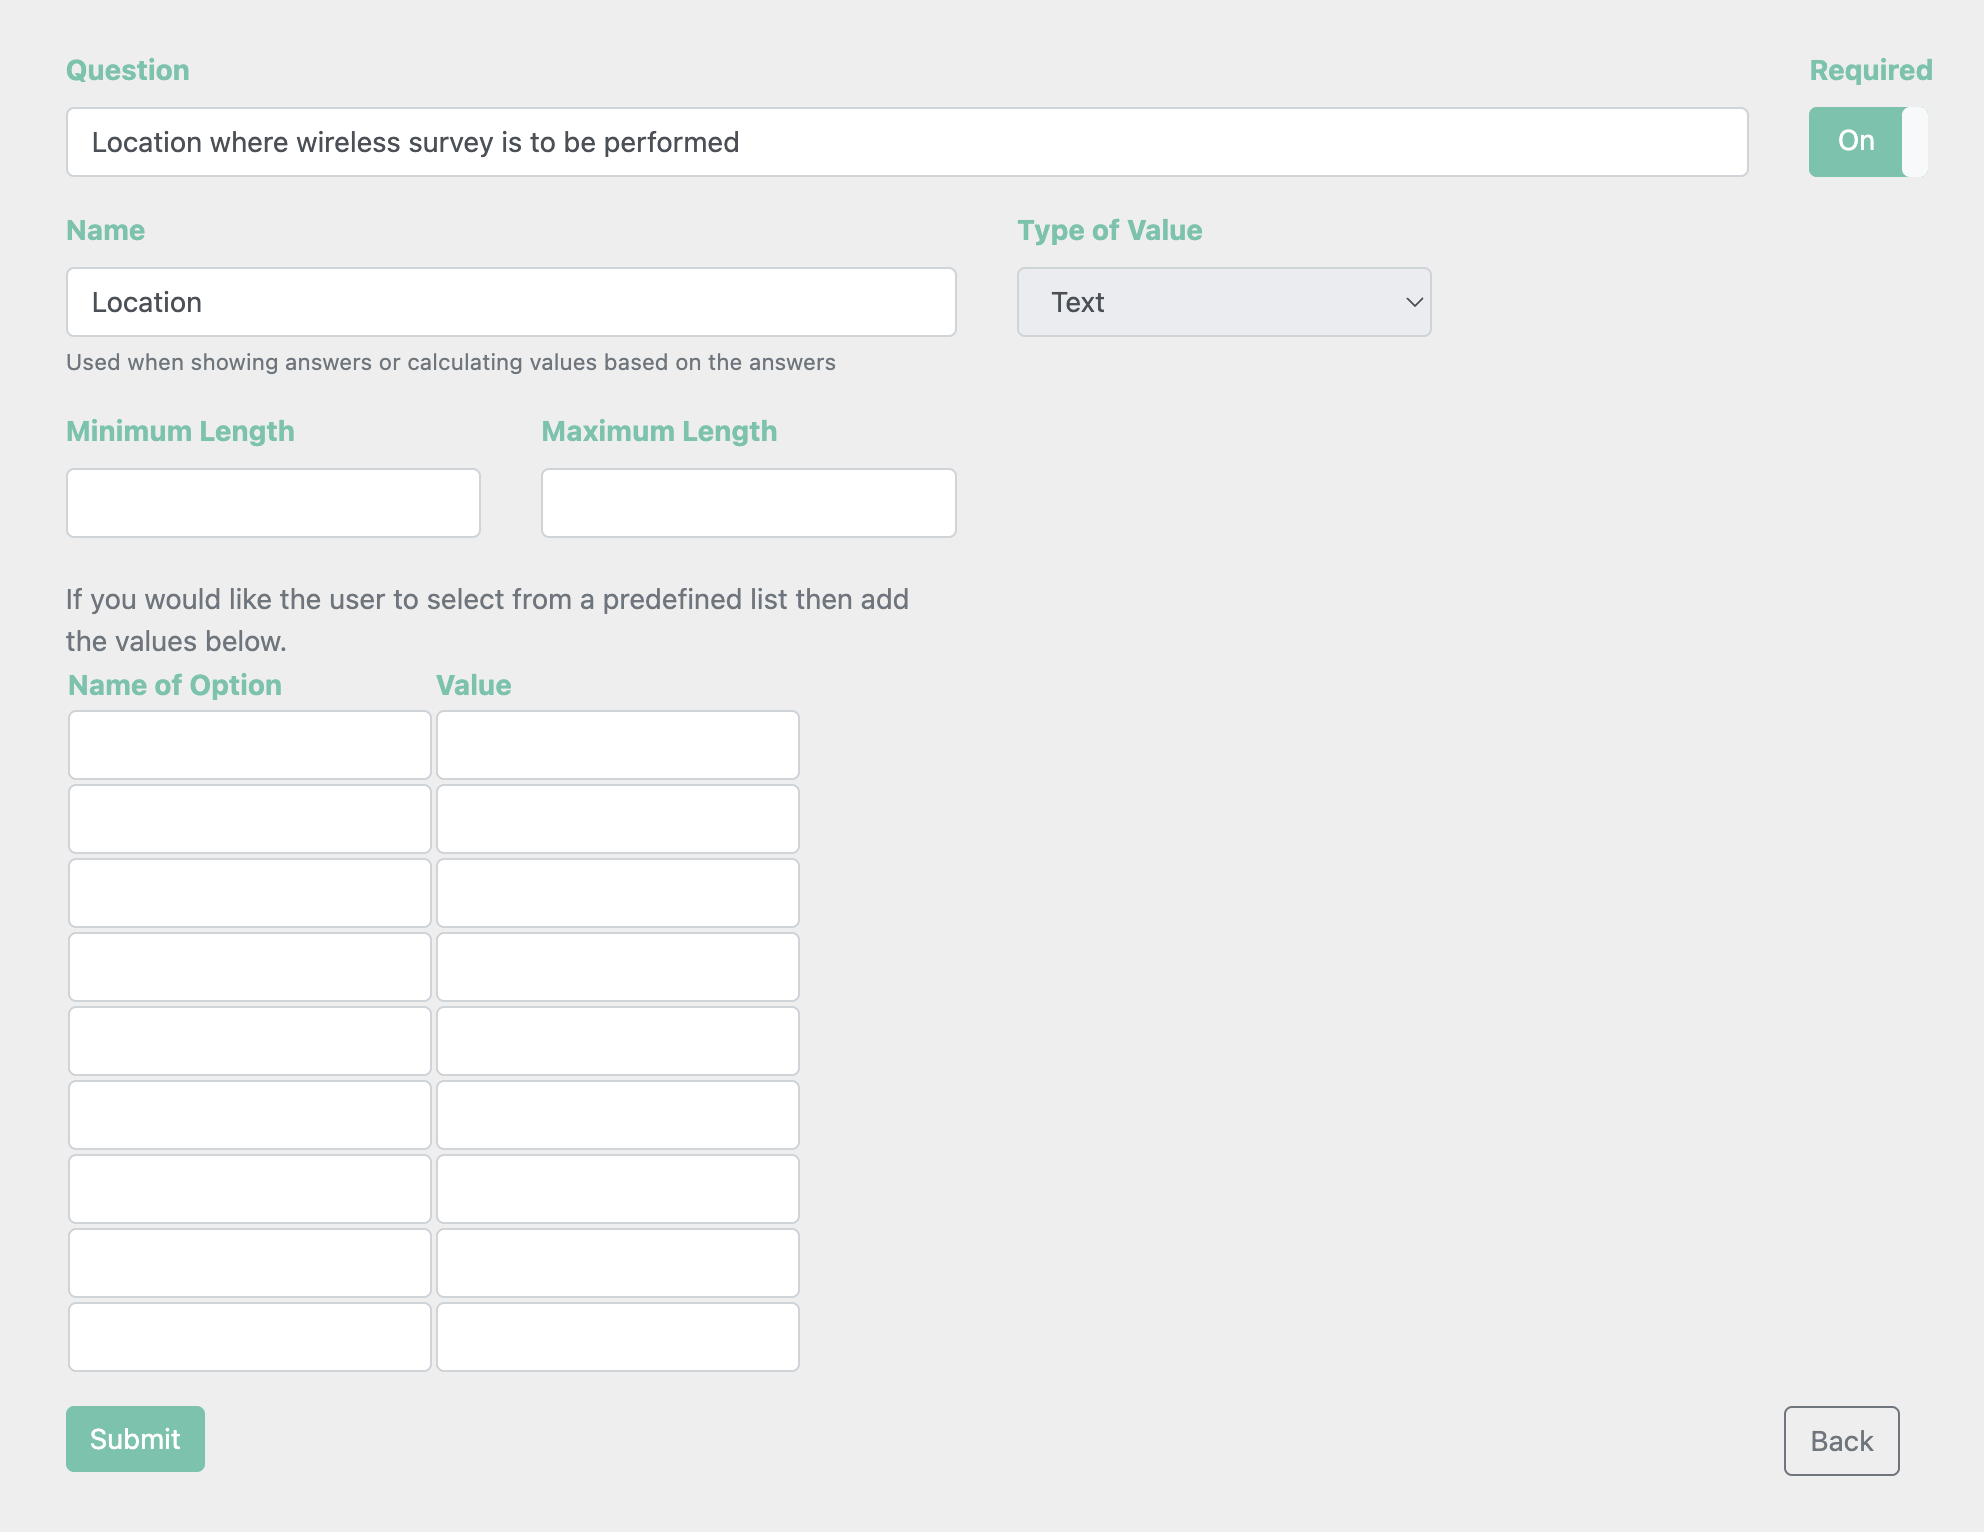
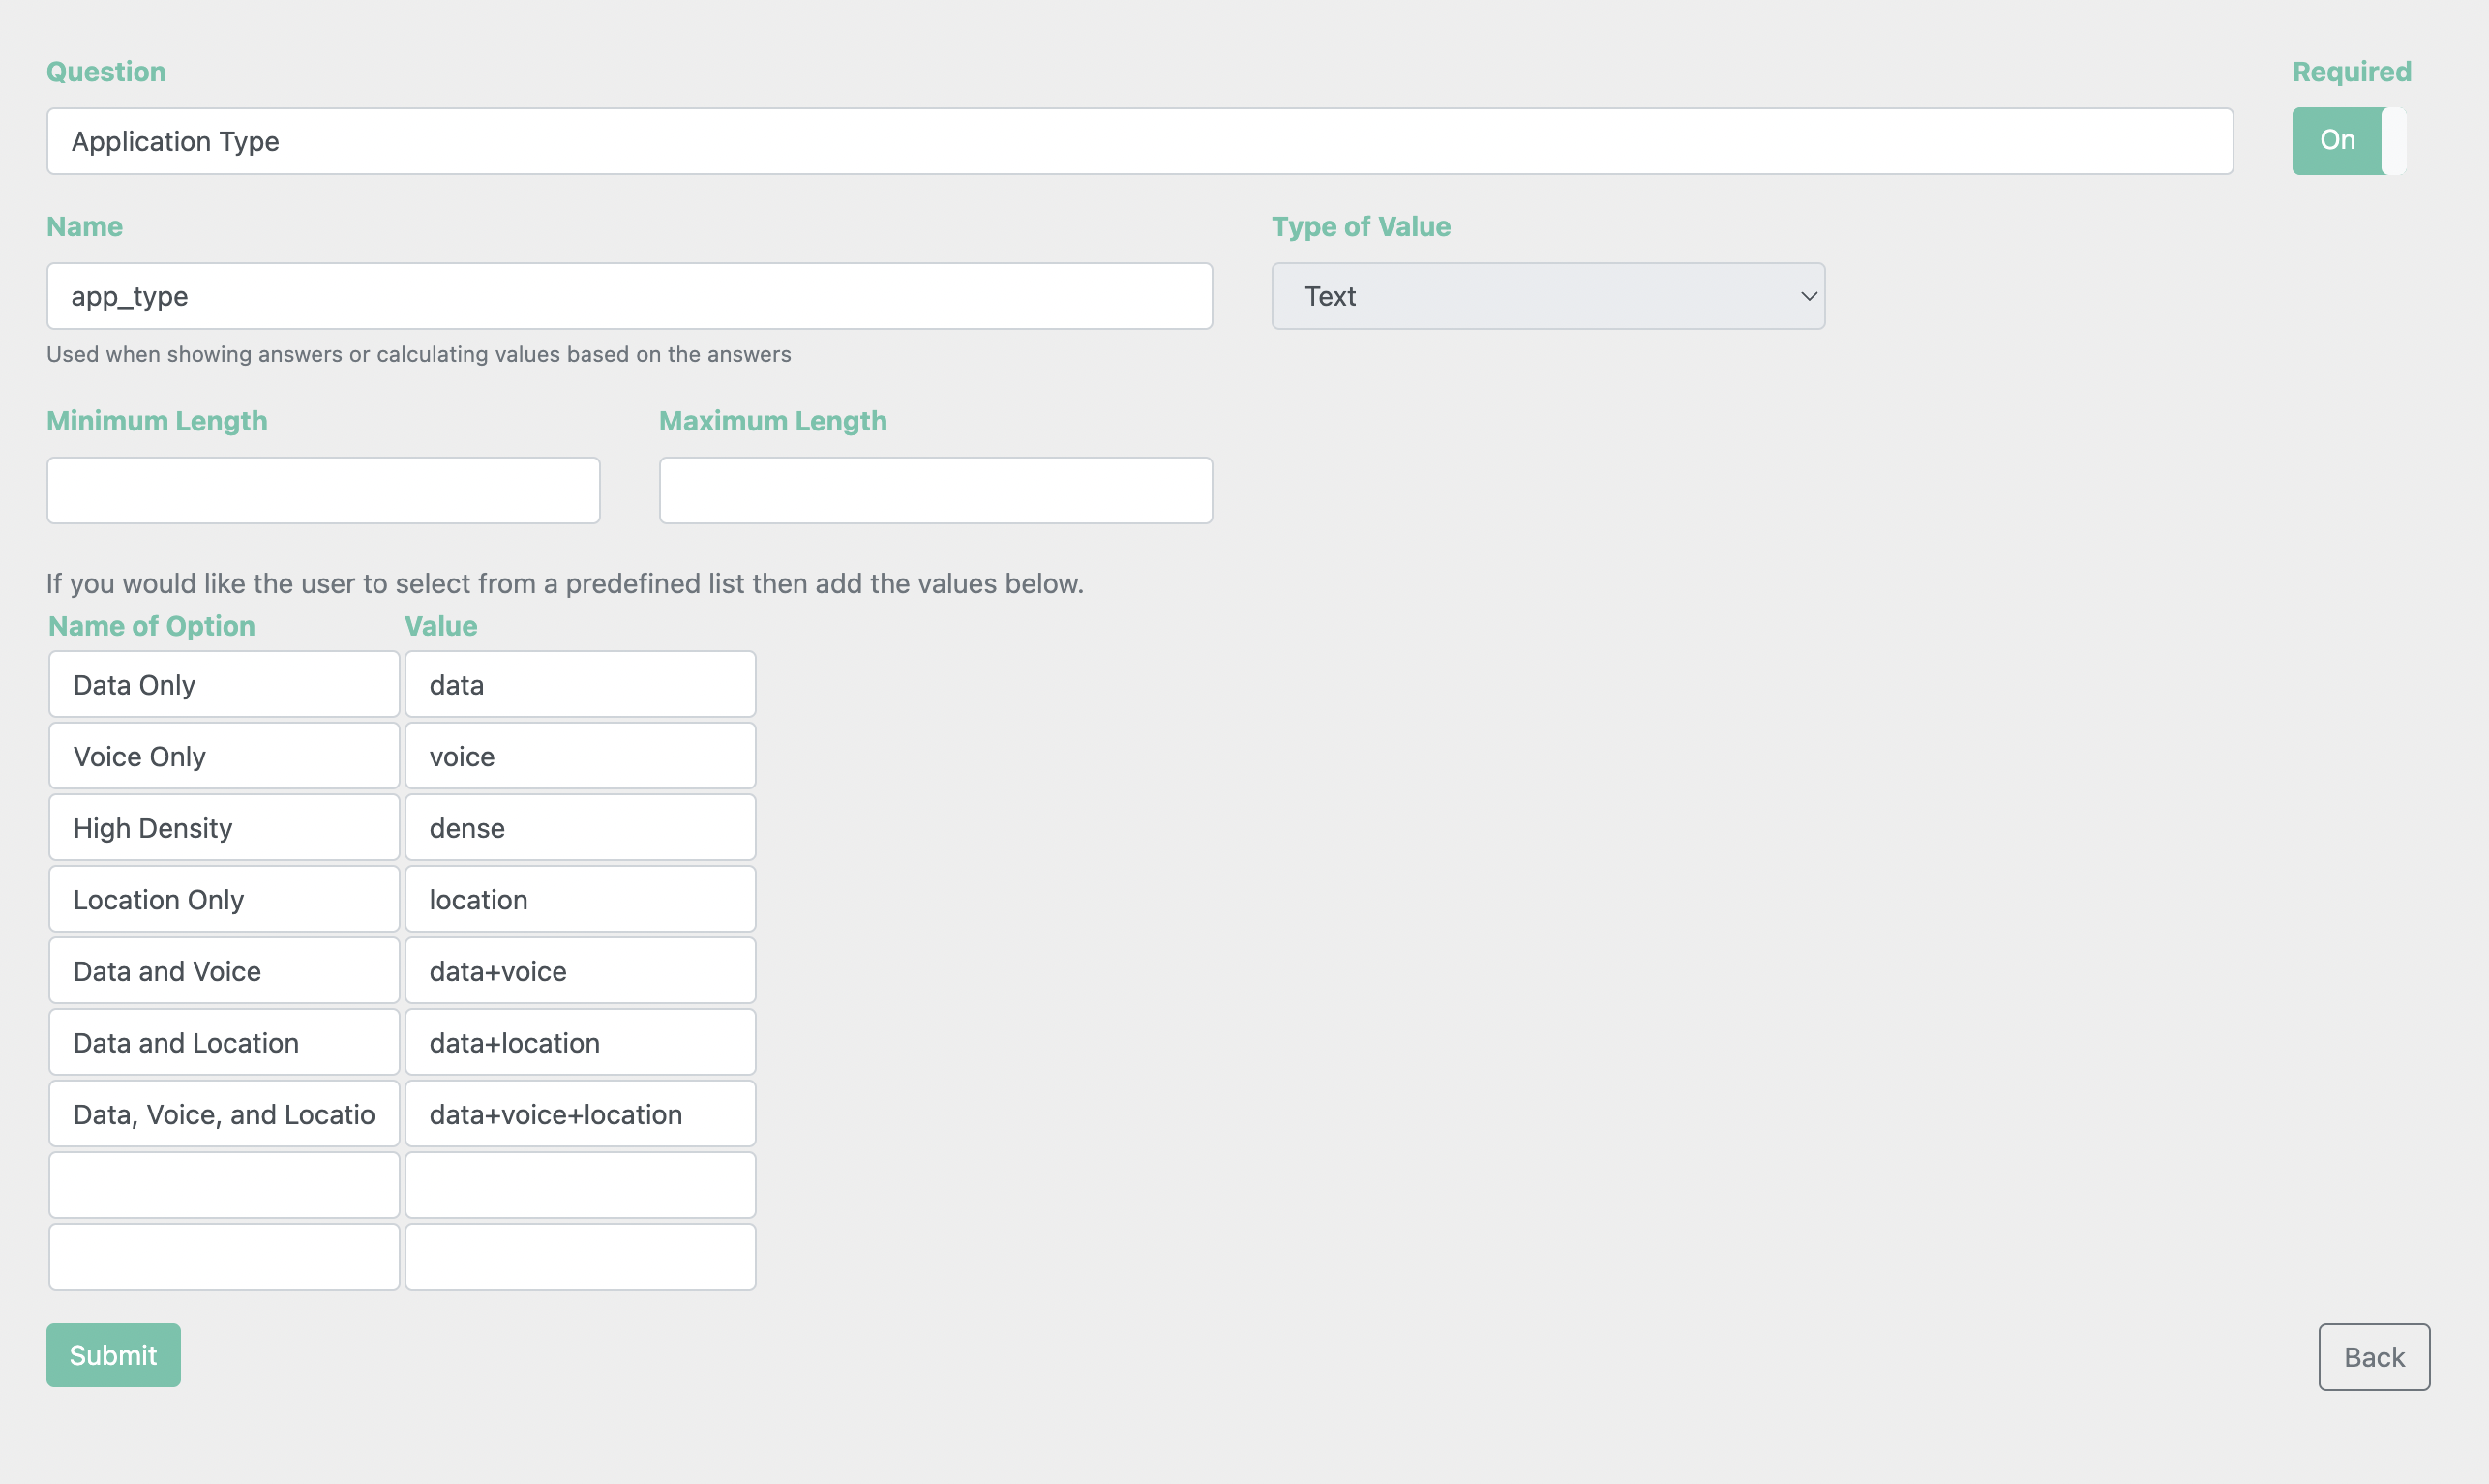
Questions have a few key components:
-
Questions: You can place the full text of your Question here.
-
Name: This short-form name is used to reference this Question's response in later steps.
-
Type of Value: Select from the options and pick the one that is the best fit for the kind of data you want to create.
-
Minimum and Maximum Length define the size of the input. You can leave them blank if they are irrelevant to what you're working to collect.
-
Name of Option and Value is used to create a single-select dropdown of options for users to pick from when completing the survey.
-
If you leave these fields blank, the user will be given an empty field to write in an answer. Ensure the type of value you expect is indicated in the Type of Value. Text values allow letters and numbers.
-
If you fill in options, the survey will present the user with a single select dropdown of the option you input here. You can use the value from the single-select options to drive logic in the following steps.
-
In our example, the first Question we'll create is a basic text question to collect the location.
You can see an example of a question that has different options here:
Lookups
Lookups allow you to use the input from a question asked to derive another value that can be used in your calculations or recommendations.
A lookup in ScopeStack works similarly to lookup functionality in spreadsheets such as VLOOKUP in Excel. It provides a way to associate a value to one or two questions with select options. For example, a Question might ask 'How big is it' with select options 'Small,' 'Medium,' 'Large,' and 'Extra Large.' A simple lookup would associate 'Small' to 10, 'Medium' with 25, 'Large' with 100, and 'Extra Large' with 250.
If two values are used for the Lookup, then a table of values is created. For example, wireless network coverage may depend on the type of building and traffic the network must support.
To create a lookup, click the Lookups tab and select + Add Lookup.
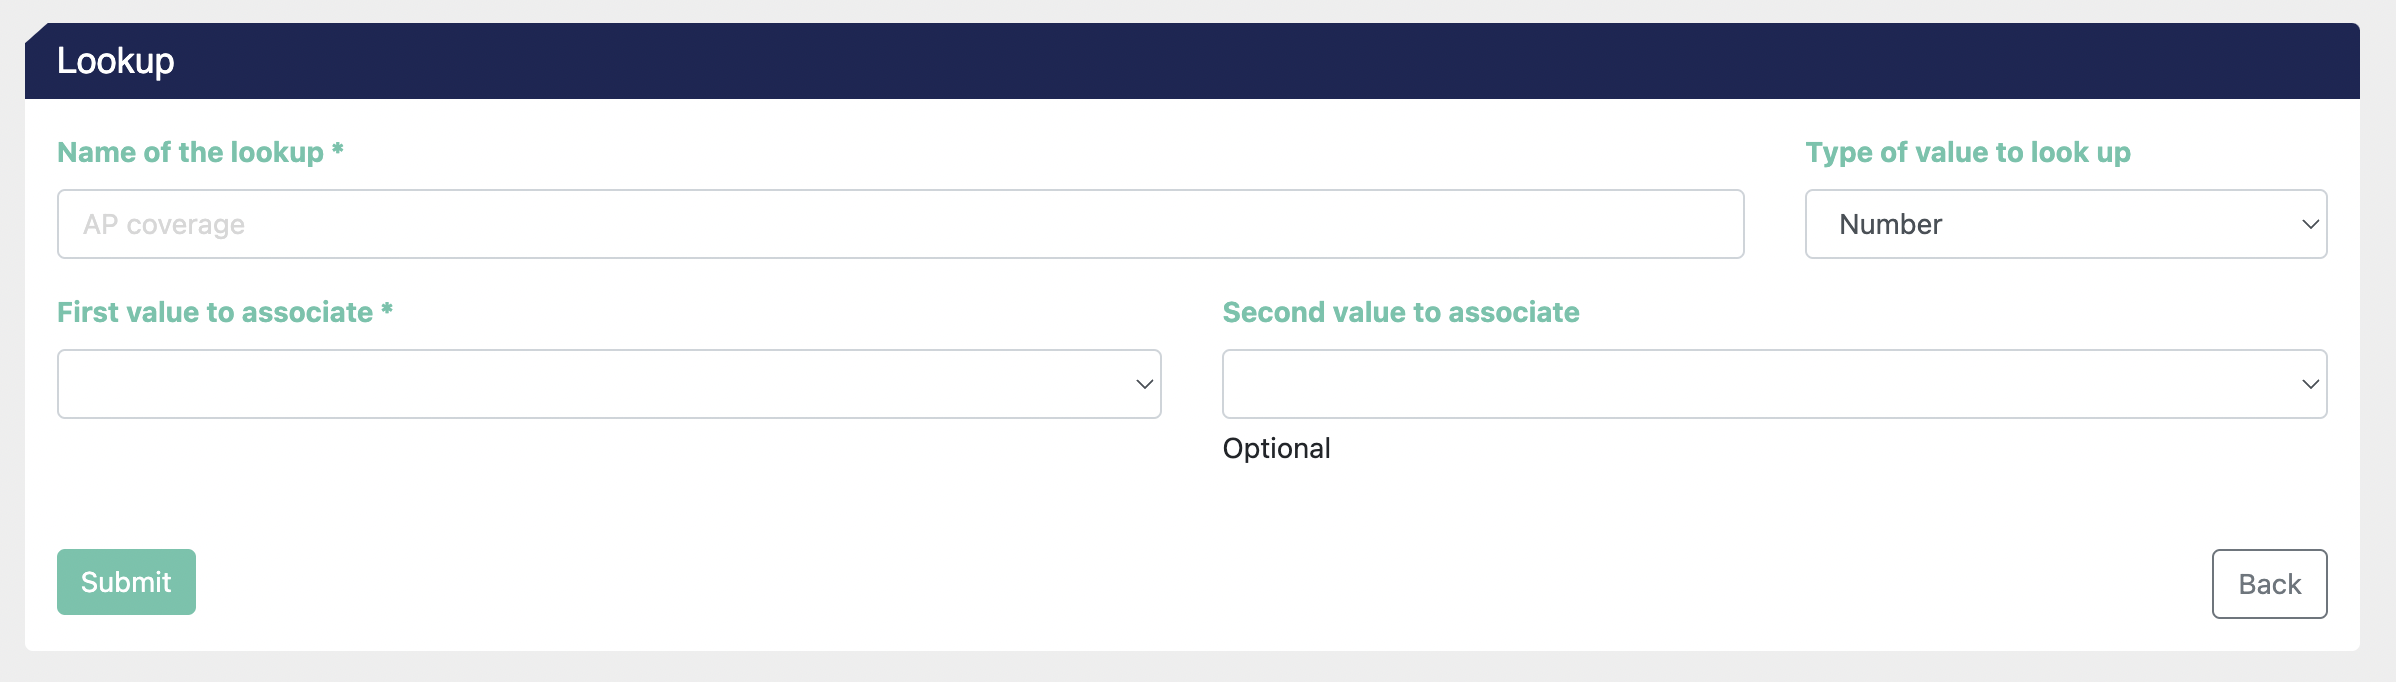
Here, you can define:
-
The name of the Lookup will be referred to in the following steps.
-
The type of value you will be outputting from the Lookup
-
A First Value to associate
-
An optional second value to associate
After you press submit, ScopeStack will create a table for you to fill in the desired output values.
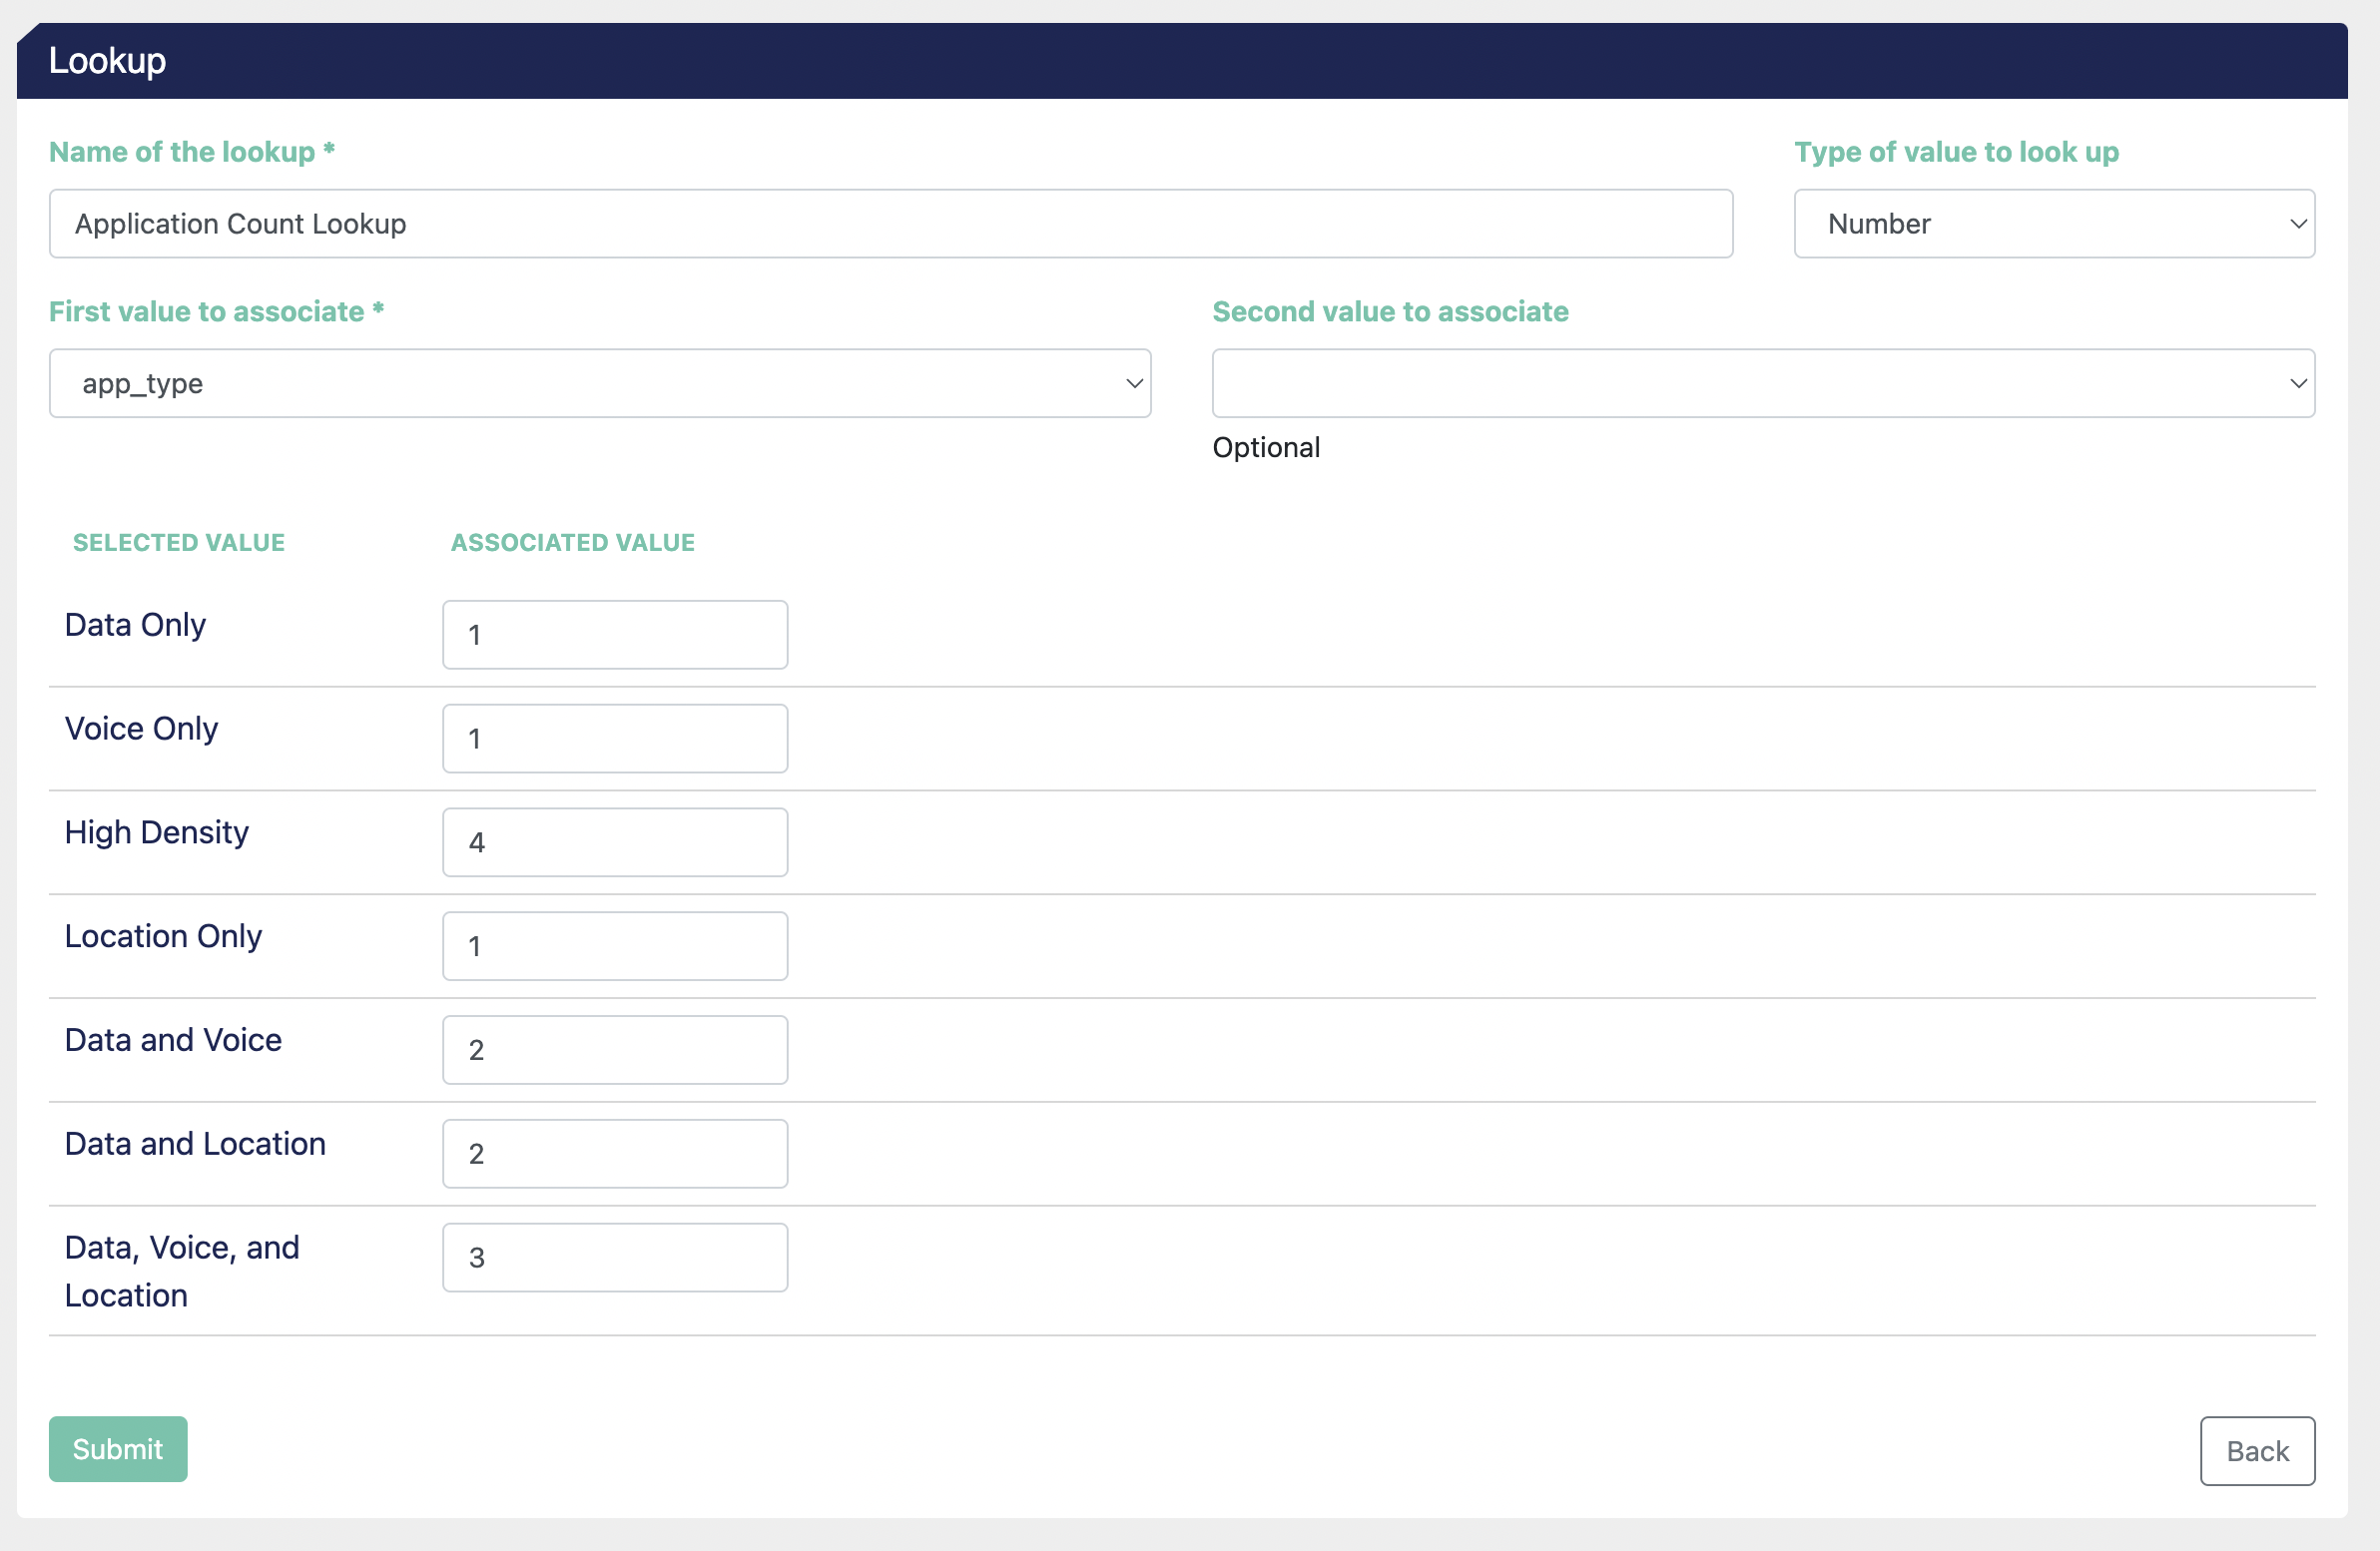
In this case, "app_type" is a question in the survey, and the "Selected Value" options are the multiple select options from the Question. If someone selects data Only in the Question, ScopeStack will return a value of "1" from the Lookup.
Calculations
Calculations take the results of the Questions and Lookups and allow you to calculate values from those questions. Calculations can also reference the results of other calculations. ScopeStack enables you to add, subtract, multiple, and divide to create values that can be used in Recommendations.
To create a Calculation, you can click + Add Calculation.
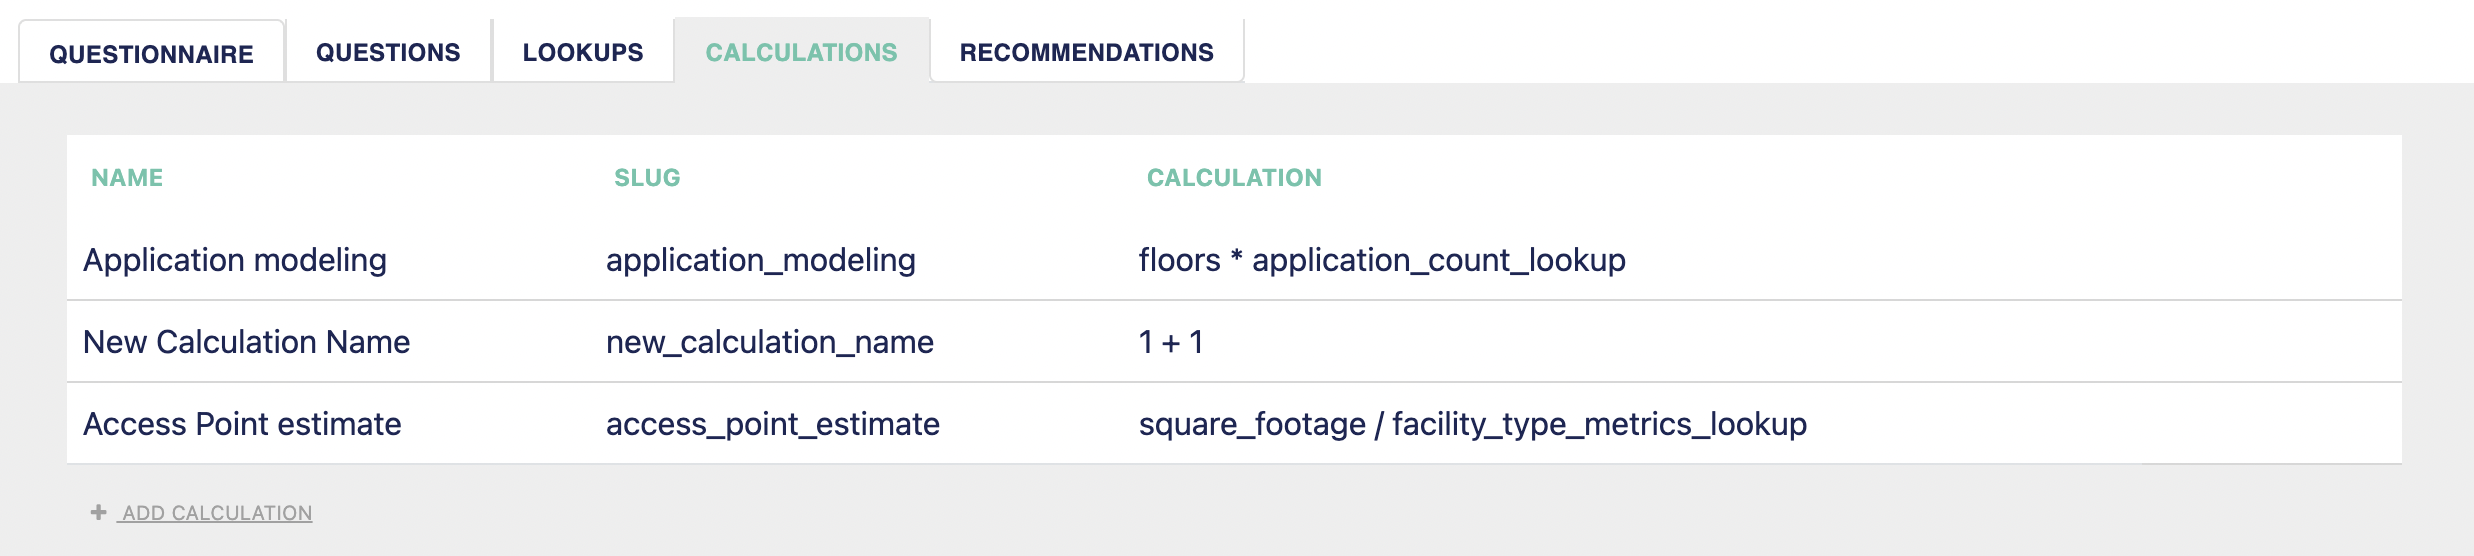
If you need to insert a simple value into a recommendation, you can also create a calculation that adds 0 + 1 to return that value.
Recommendations
Recommendations allow you to suggest services based on the Questions, Lookups, and Calculations. You can:
-
Select the item you want to recommend for a project and define its quantity based on the results from previous steps
-
Define the criteria that dictate when the platform will recommend the service offering based on the results of earlier steps
To get started, click + Add Recommendation.
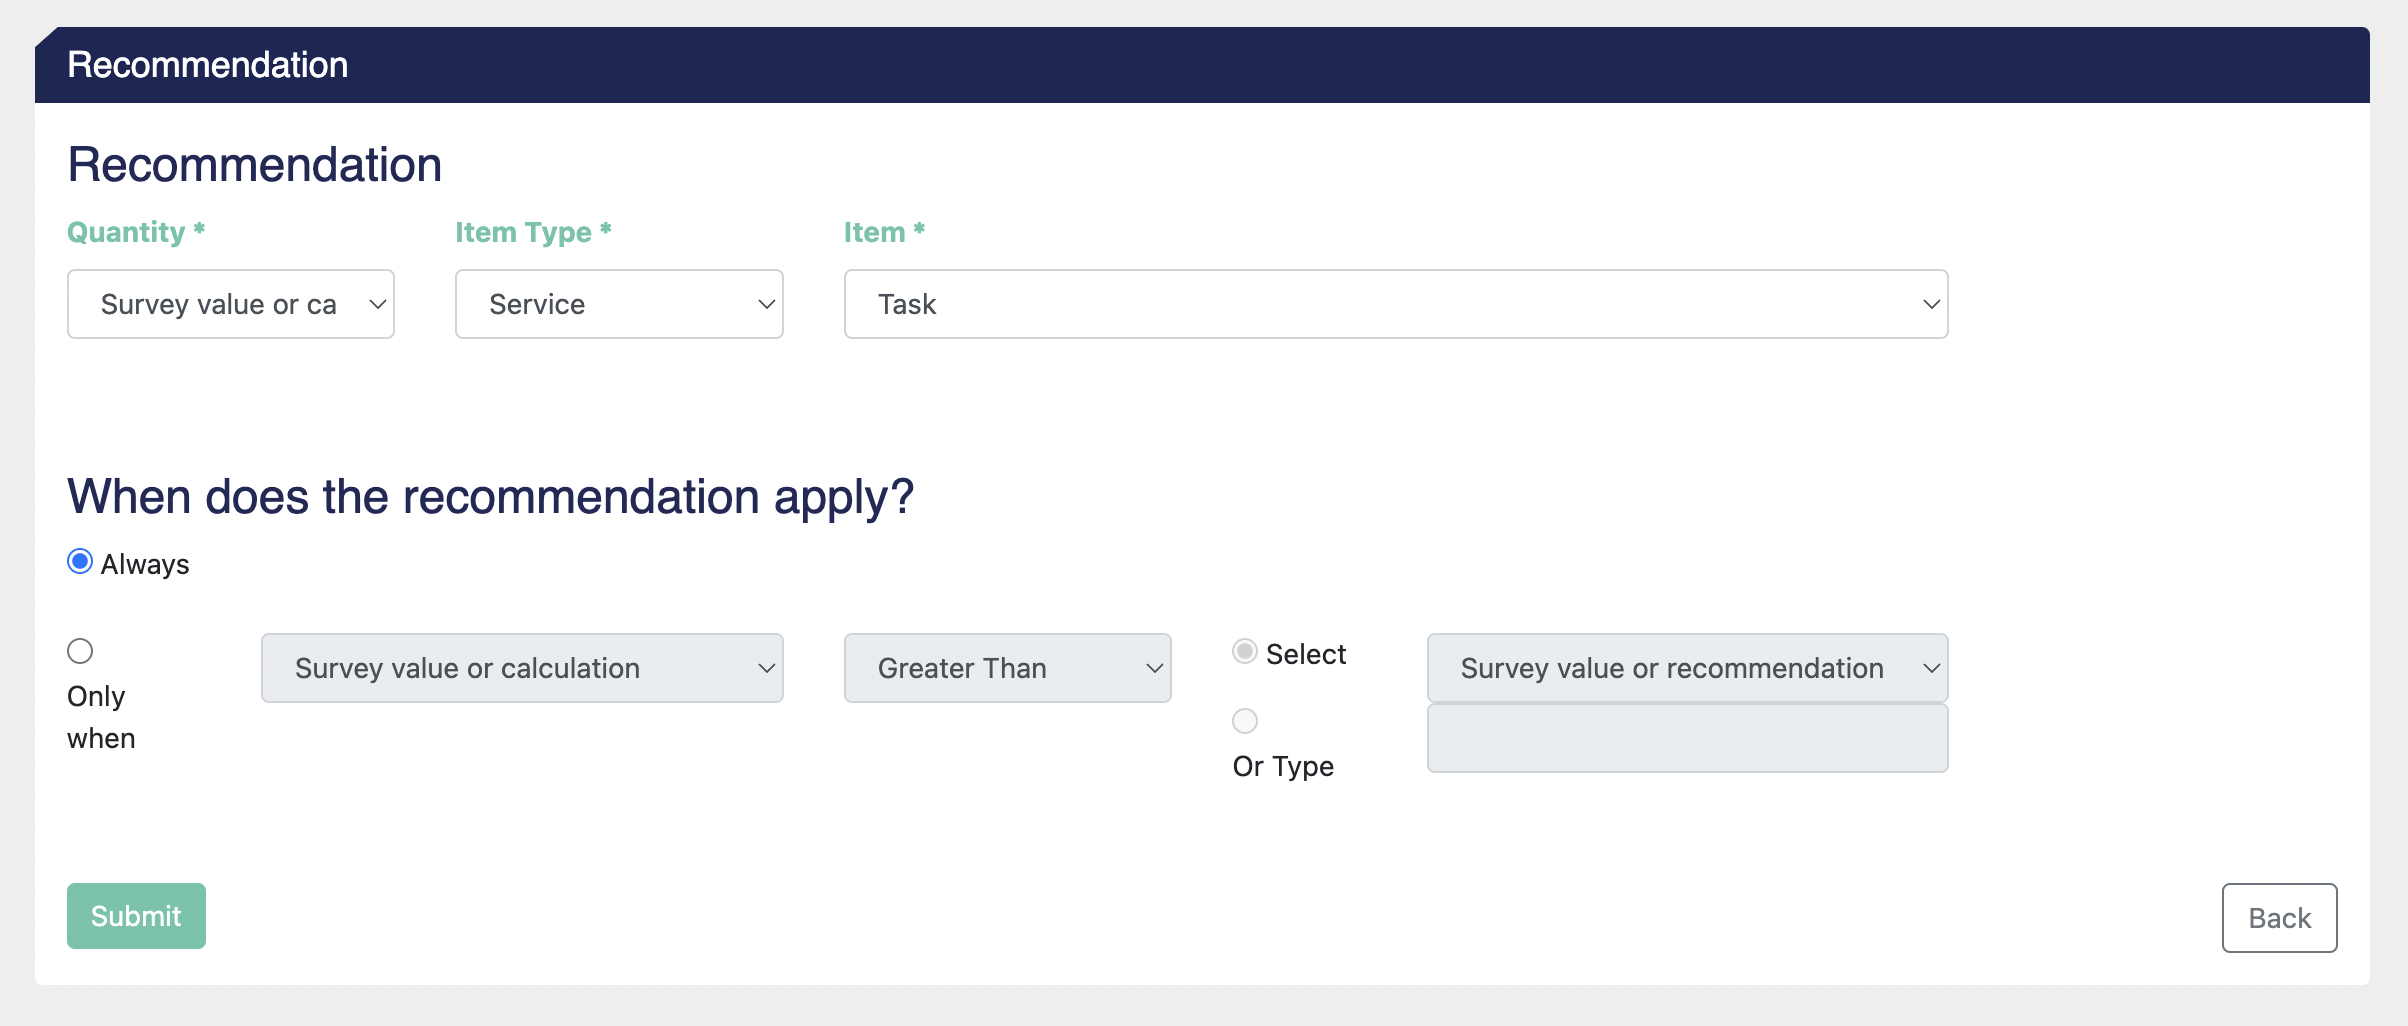
Here, you can define:
-
Quantity: Here are the results of the questions, lookups, and calculations from the previous steps. Depending on what's being returned, the value selected here will be utilized when adding the item to a project.
-
Item Type: Item types can be...
-
Service: If a service is selected, the quantity specified in the previous step will be the quantity of the service.
-
Governance: If governance is selected, the quantity will be either the number of hours of the governance item or the percentage of total effort the governance should be calculated from, depending on the setup of the standard governance item in settings.
-
-
Item: This is the item to be recommended.
-
When Does the Recommendation apply: This setting defines when the platform will suggest the Recommendation.
-
Always: This will return the Recommendation every time.
-
Only When: This will allow you to define a logical test for when the platform should suggest the Recommendation.
-
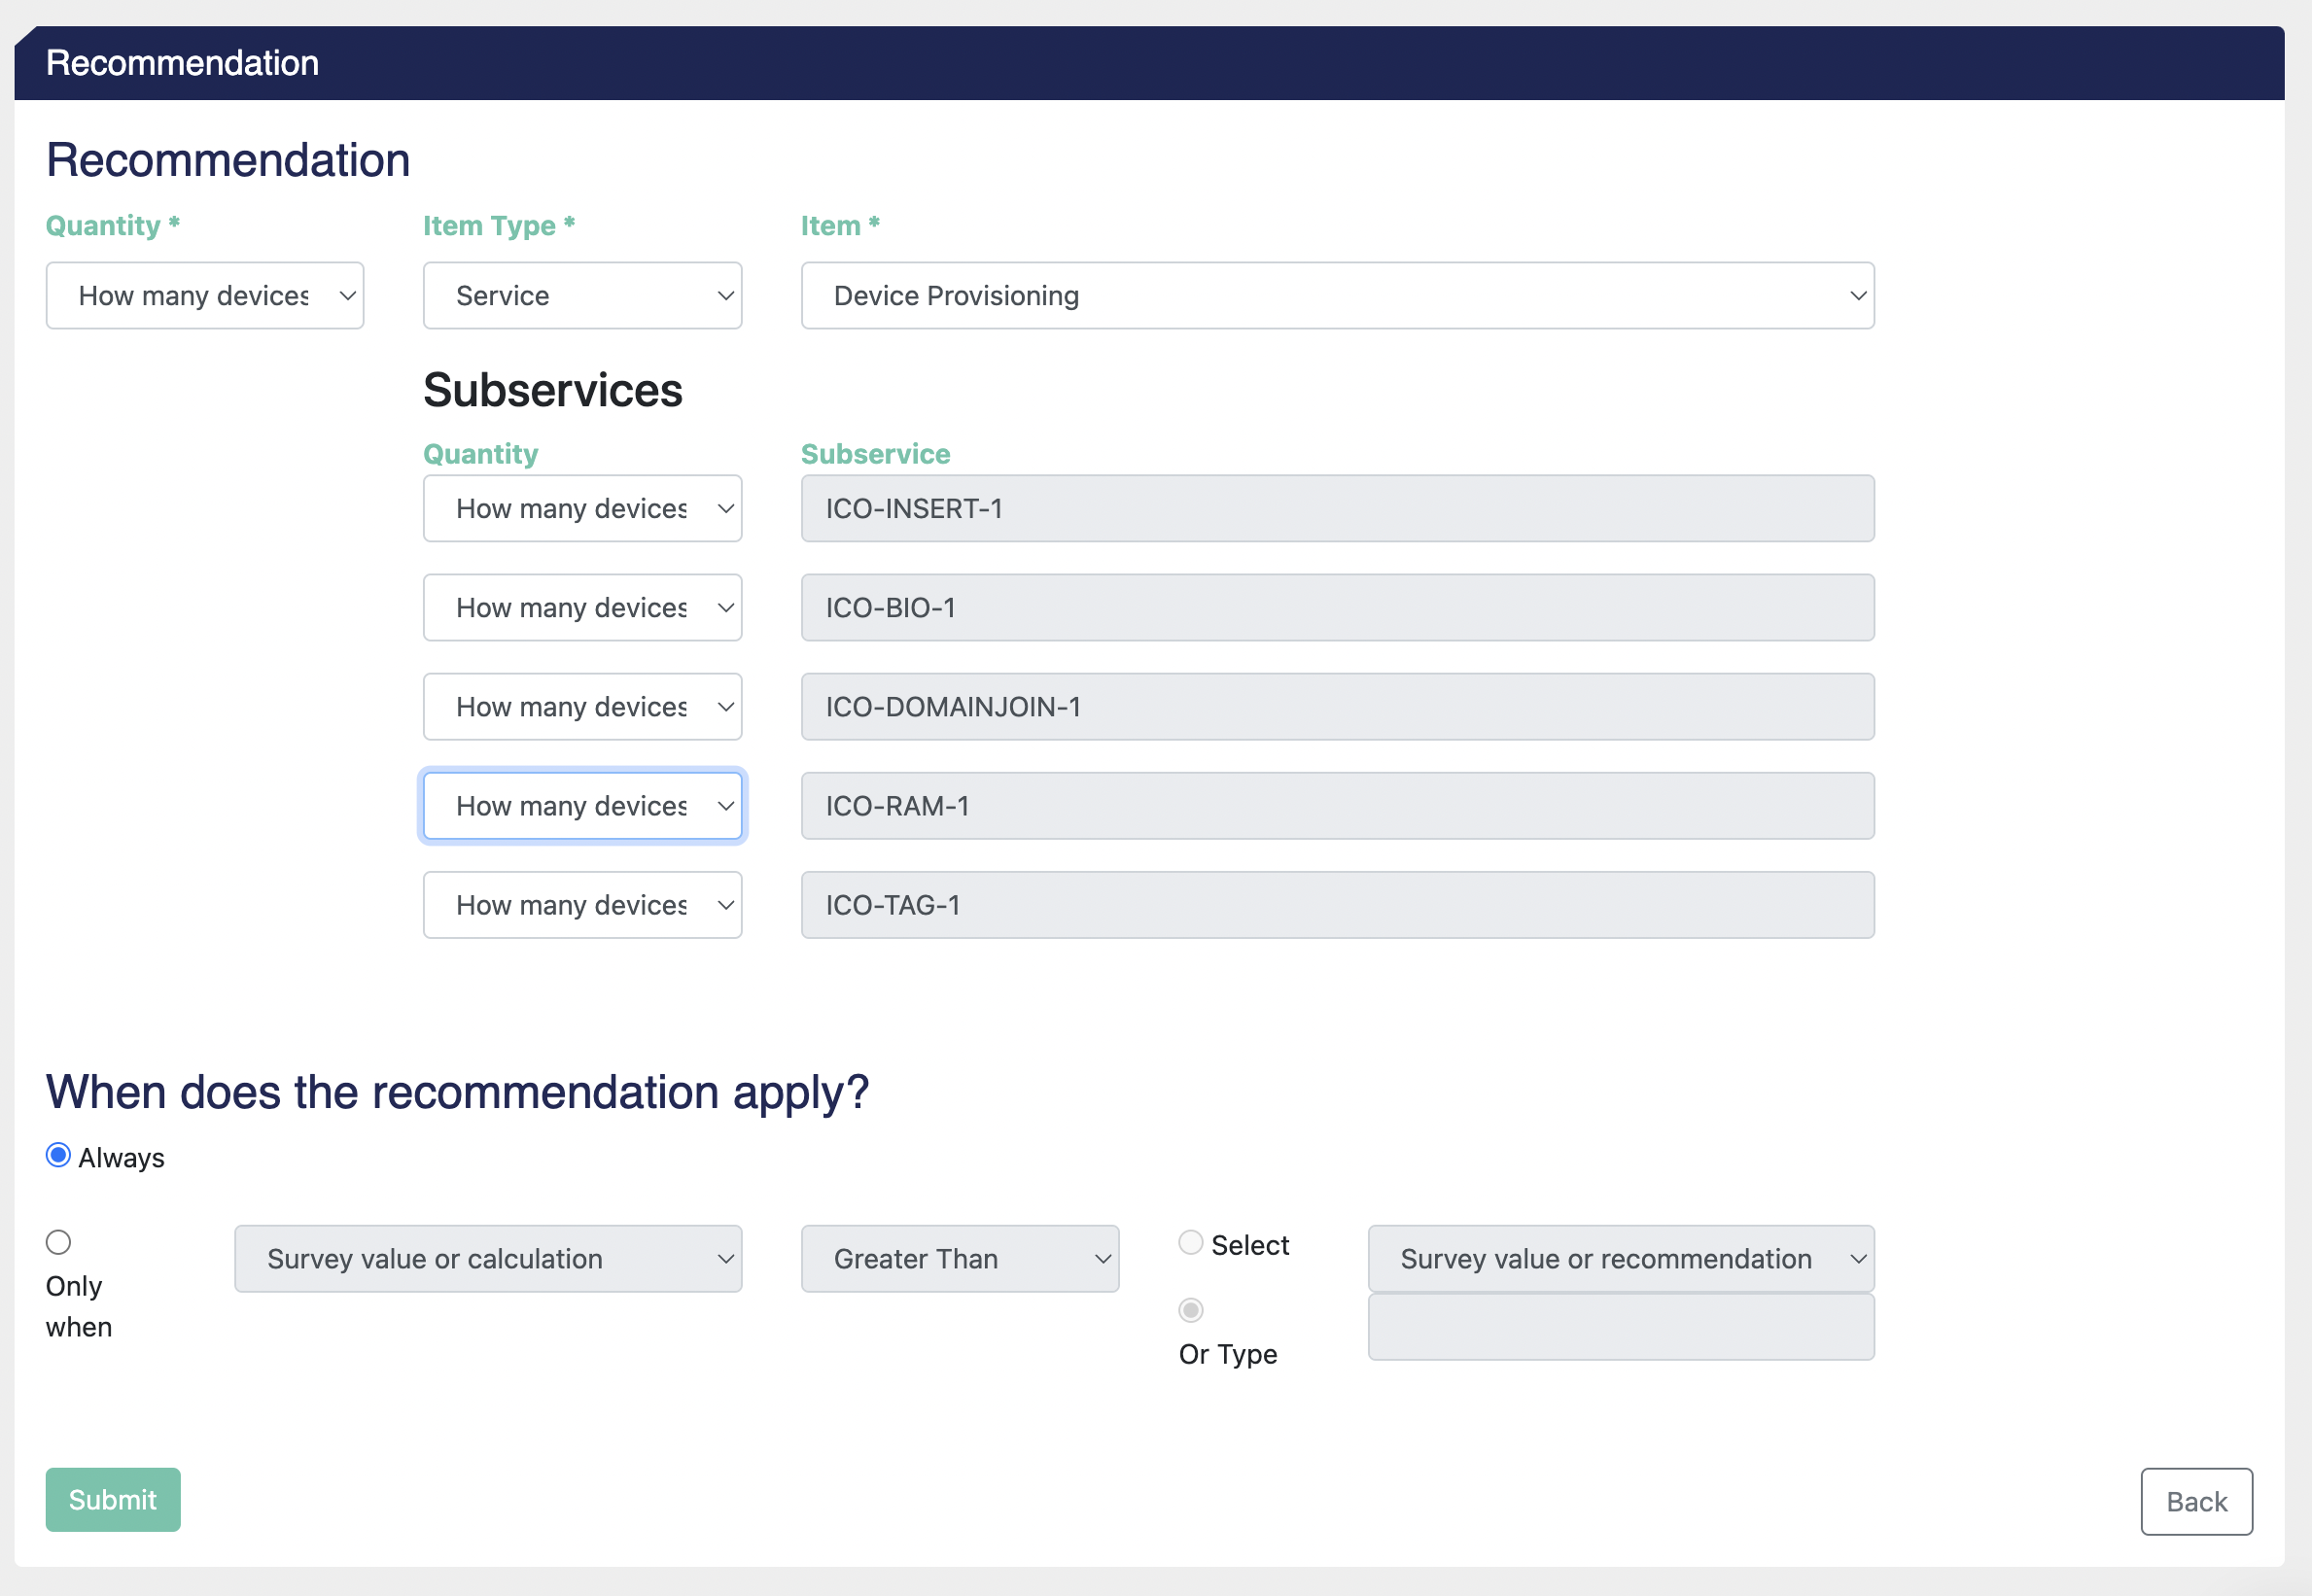
After pressing submit, subservices for the service will also become available for recommending quantity values.
You're now ready to use your survey to create projects easily!
 Did this answer your question?