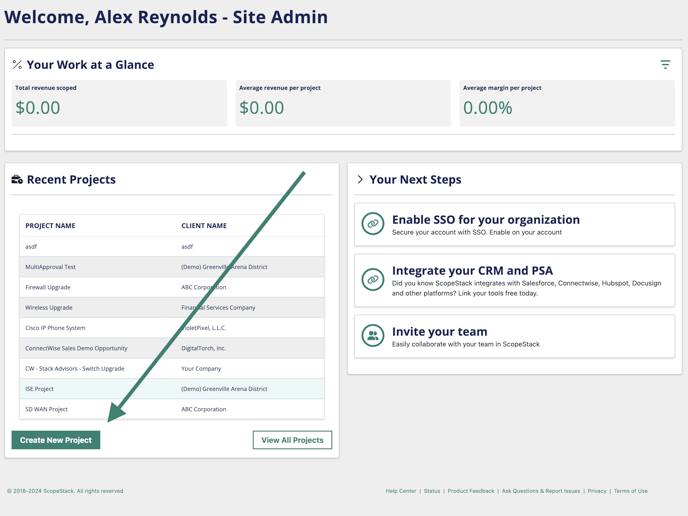
Creating the Project
First, select Create New Project from your Home or Projects page.
Give the project a name, and complete the basic information by filling in or selecting options. If you've already connected your CRM, you can select from available CRM opportunities.
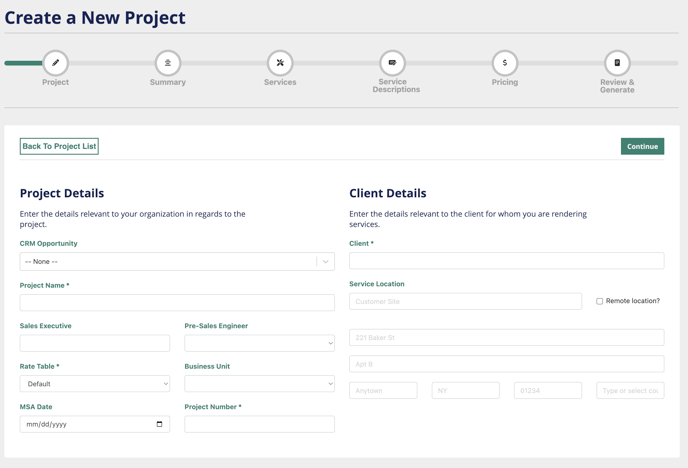
When you press "Continue," you will have the option to either proceed with the Project Creation Workflow or exit to the Project Editor.

For first-time users, we recommend using the workflow to help you understand the essential elements required for your project.
If you follow the workflow, you will be given the opportunity to:
- Define your Customer Summary information
- Input your Customer Contact Information
- Make Internal notes for your team
- Add services to your project from your list of standard services, Blueprints, surveys, and completely custom services
- Review your service descriptions and other language.
- Setup your payment terms
- Review your project and generate your document
After you complete the workflow, or if you choose to go there first, you will navigate to the Project Editor for more advanced project configuration options, including adding products, customizing governance items, and more.

If you want to add any additional information to your project, you can do so by navigating the left menu items.
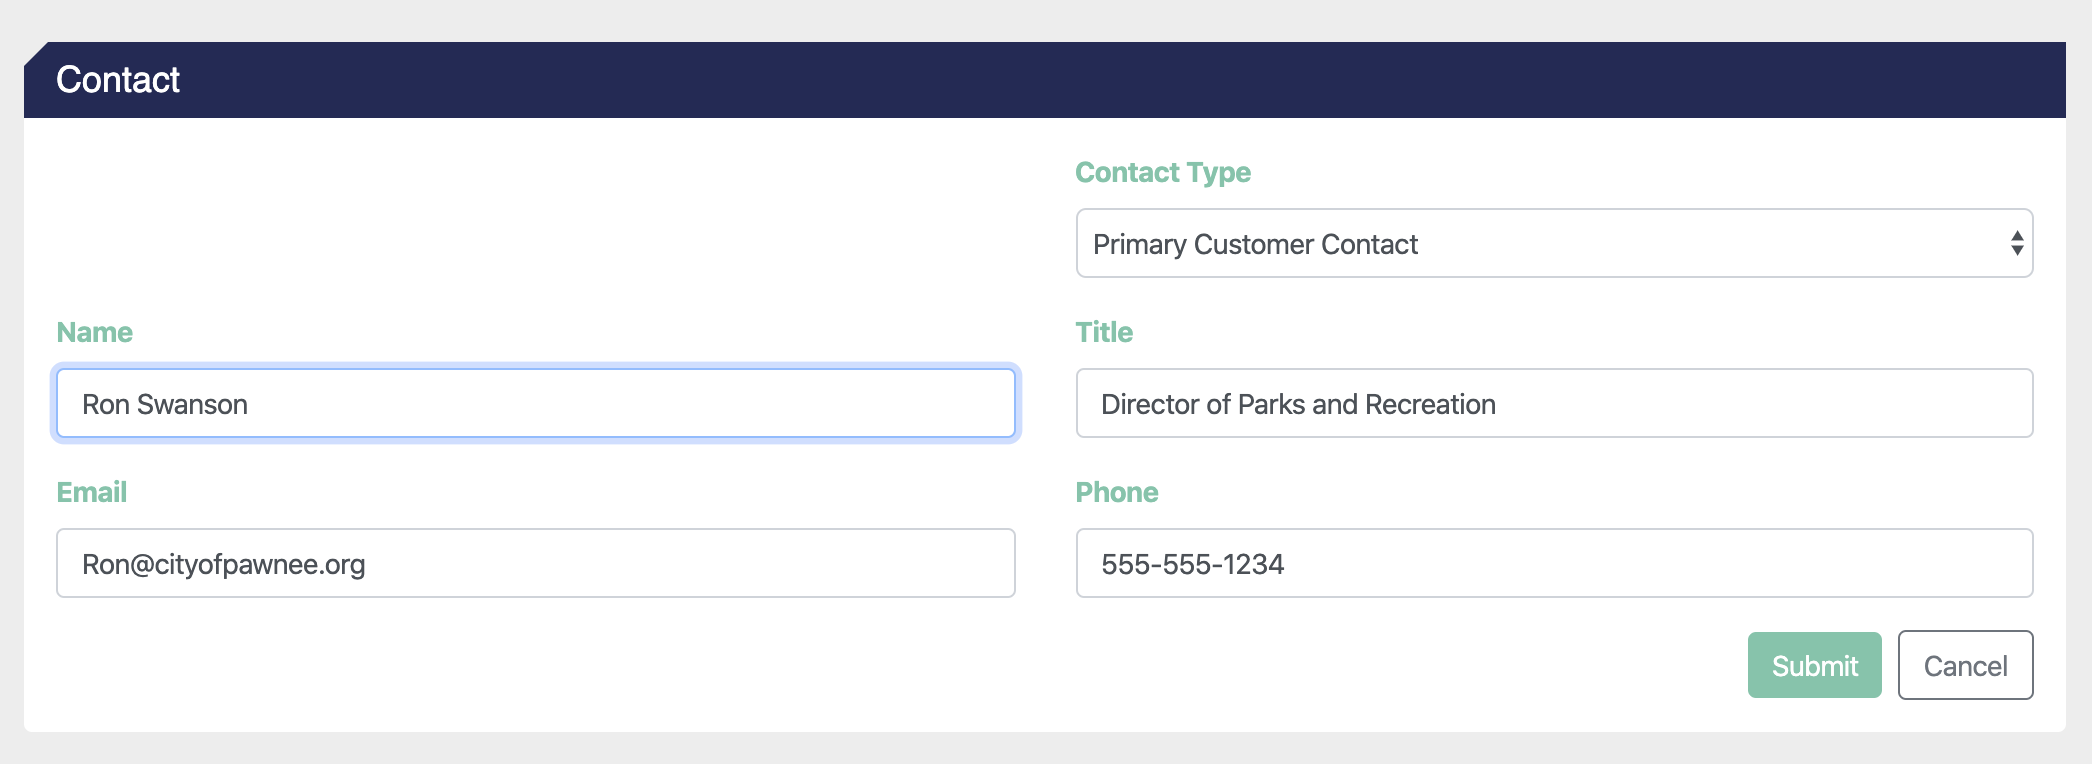
For example, when you select General > Contacts and click Add Contact, you can enter the contact's name and click Submit.
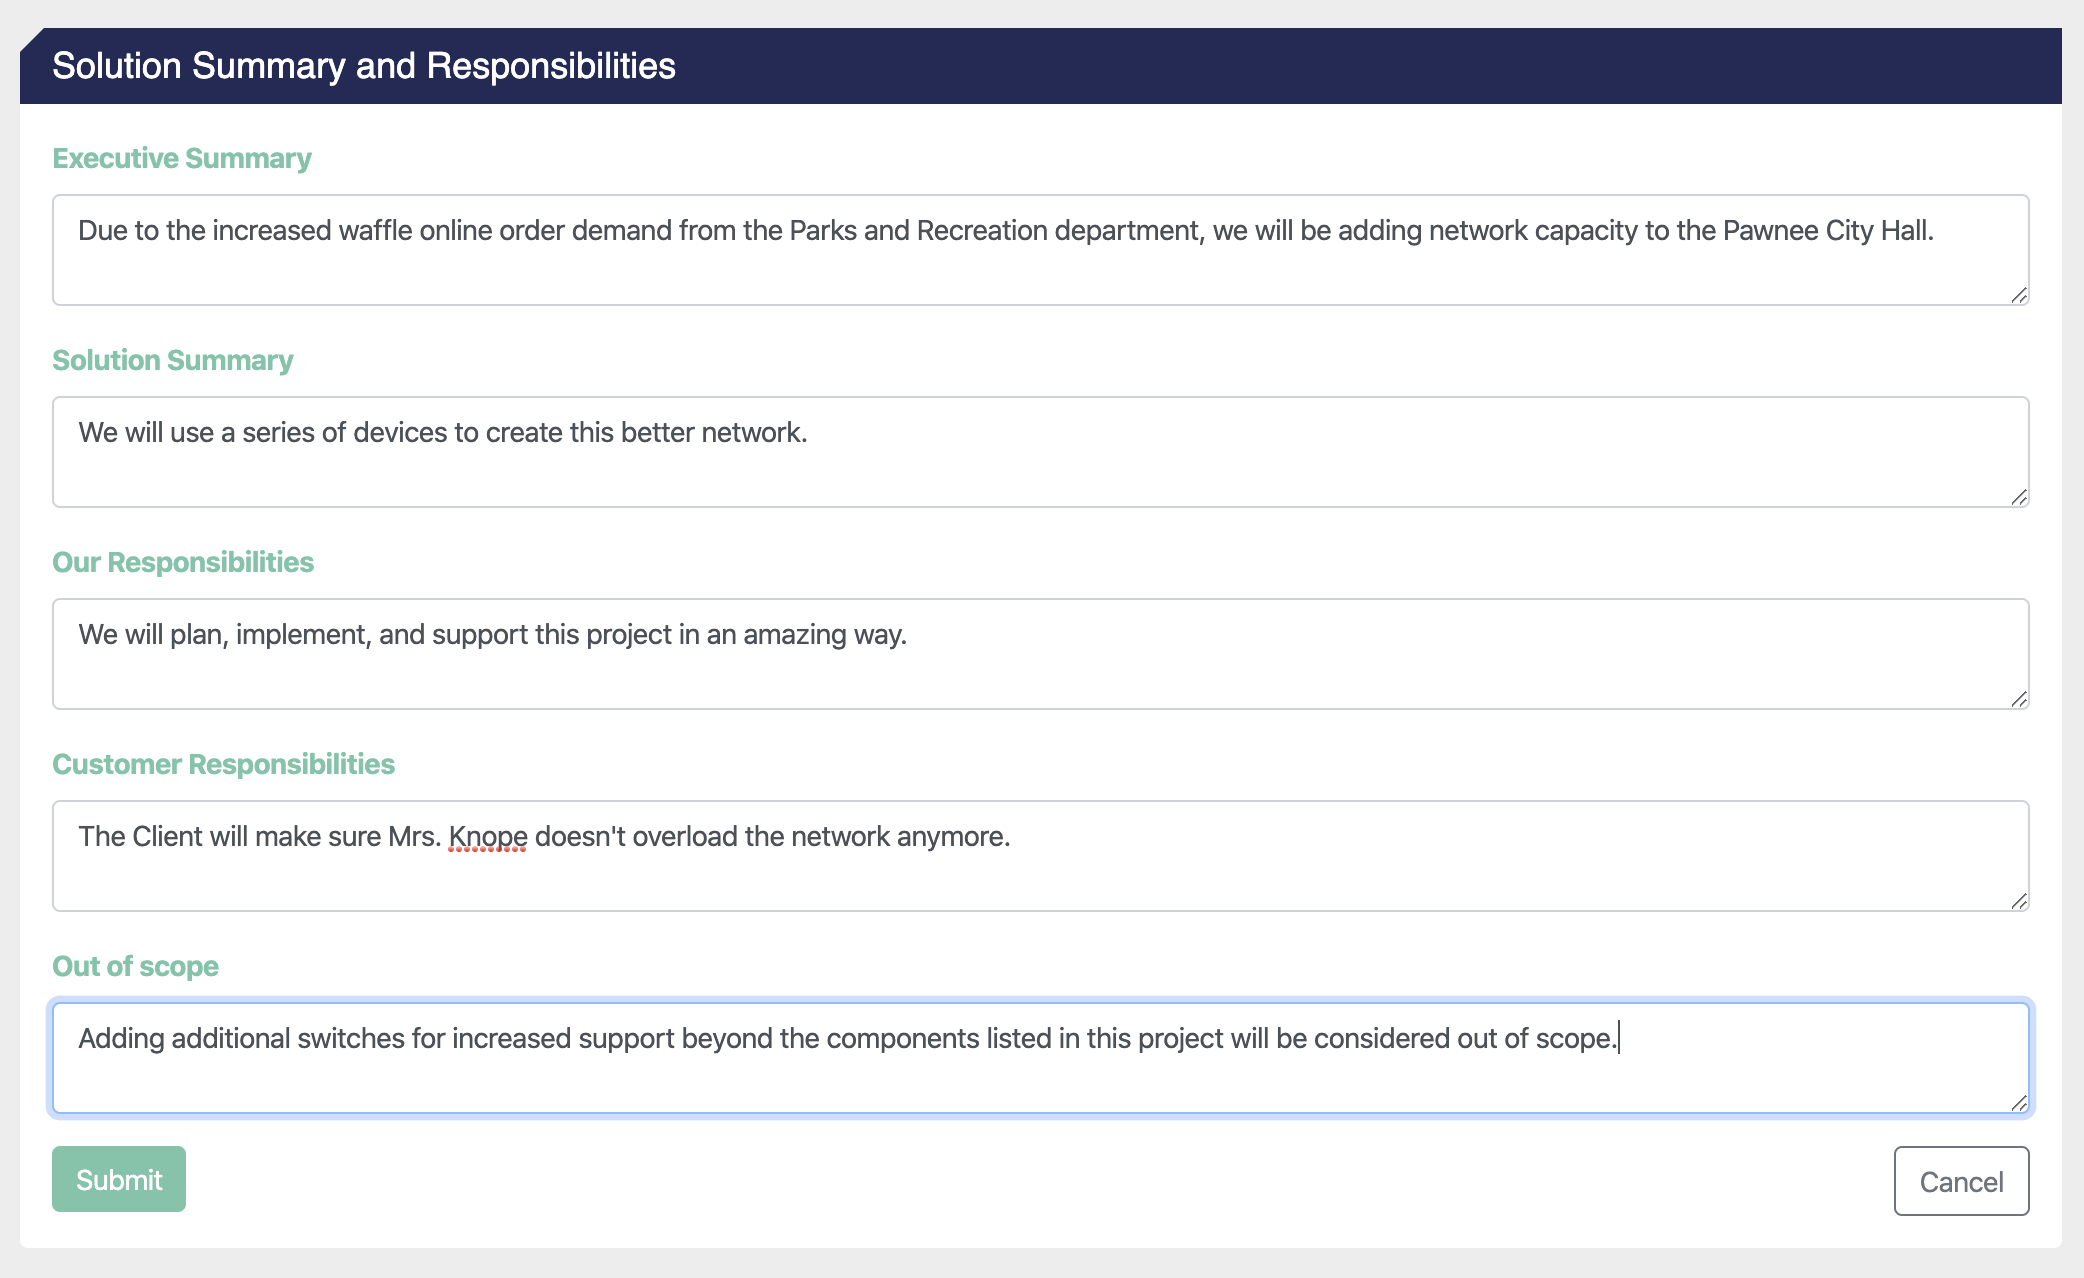
You can select Overview > Customer Summary to review what was added during the workflow or add in some general information about the project. After you have completed these fields, click Submit.
To review or modify your professional services, select Services under Professional Services.

From here, you can do a few things:
-
Add pre-built Services to your project that you've already defined in Settings.
-
Create custom services just for this project. To do this, simply start filling out the fields present on the screen and click Save Services.
To move things along, we will add some standard services, so let's click Add Services/Blueprints.
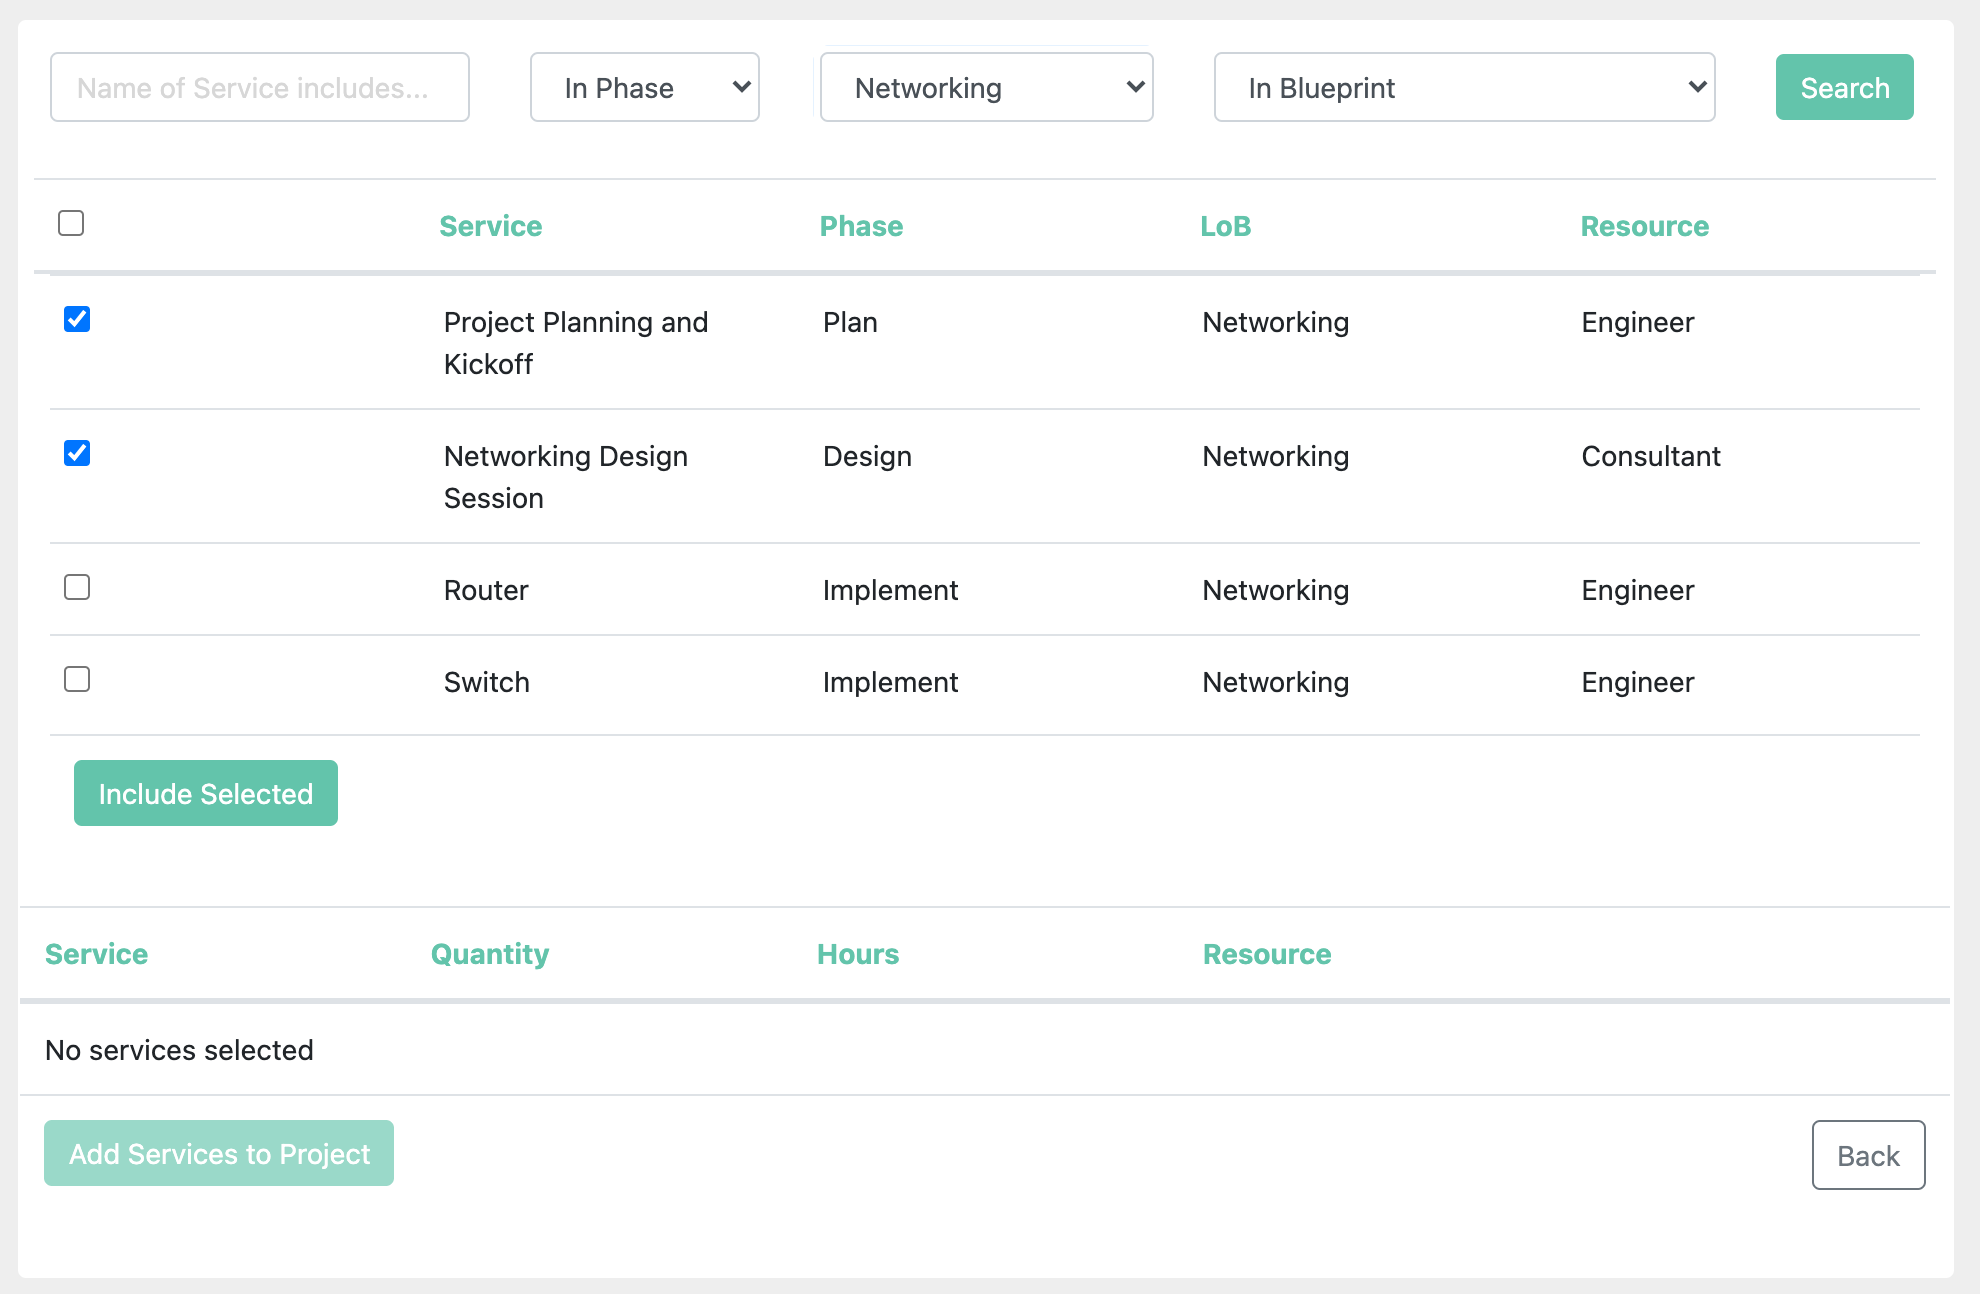
On this screen, you can filter the available services by Name, Phase, Line of Business, or Blueprint and click the Search button to query the database. The available services that meet the criteria will be listed, and you can checkmark the services you want to include and click Include Selected to add them to your queue.
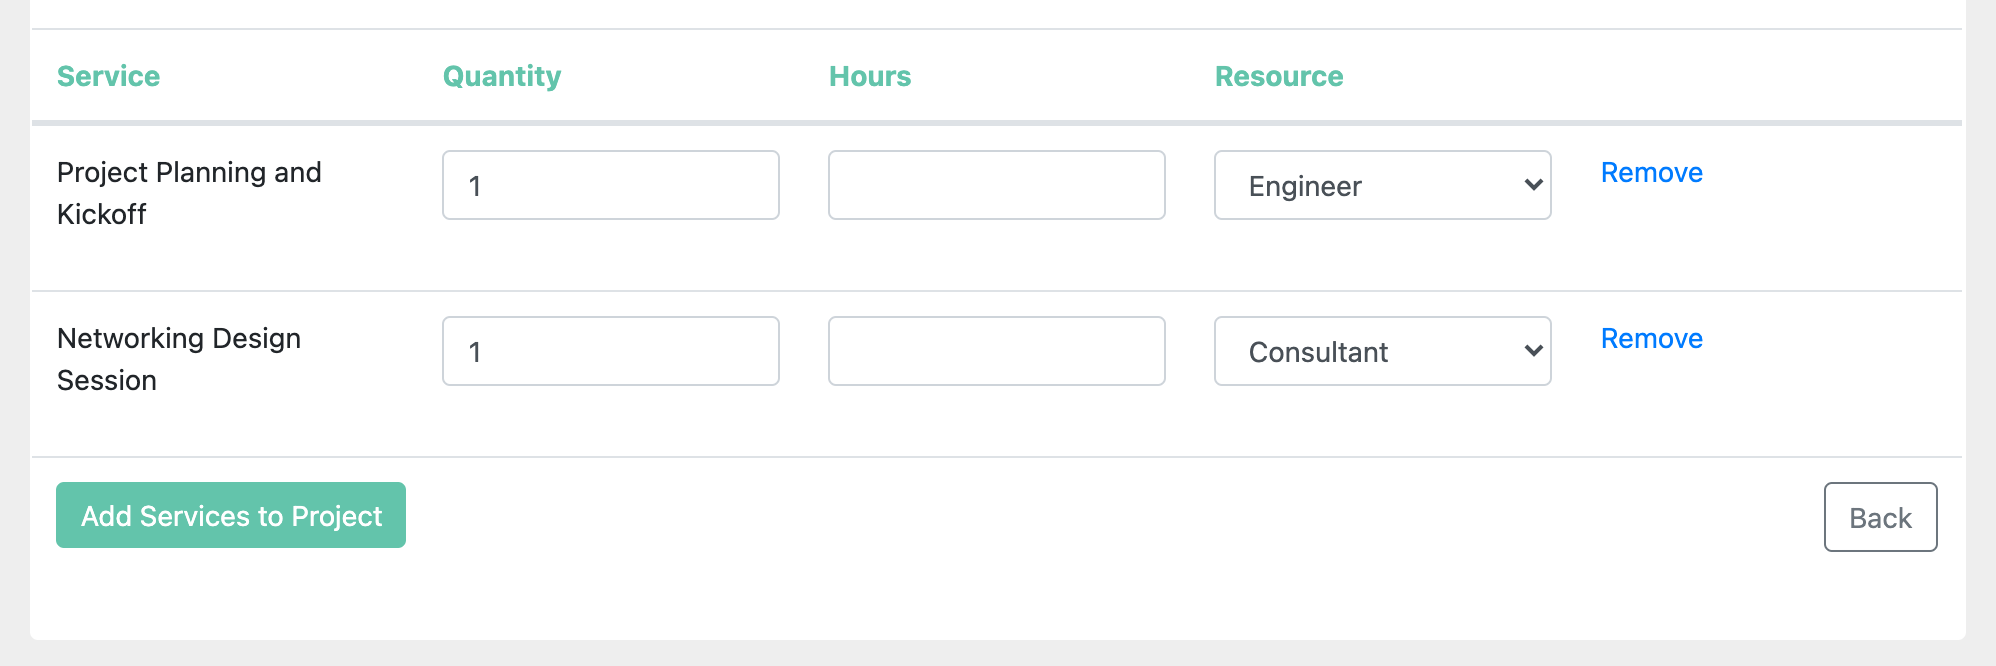
Once you've selected all the services you want to add, click Add Services to Project to add the services to the Professional Services list.
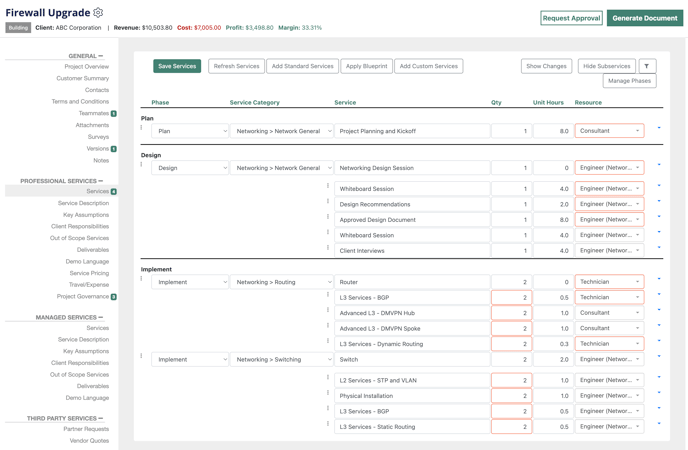
You can now see all the Professional Services in your project. You can add more services using the options above the service listing. When you're ready, you can now generate your first document!

Click the Generate button next to the dollar amount in the top right corner of the page. Select the appropriate Document, and click Generate.
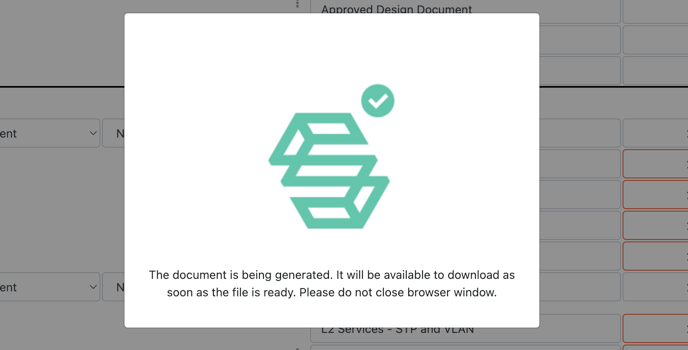
When your document is ready, you can click the download button.

Open up your document and review it to see how the language and items you input into the project appeared in the template.
If you want to modify the language, you can simply go back to the Project Settings or Platform Settings and make any changes you would like.
Congratulations on creating your first project. Please keep working with the platform, and see the Help Center on articles about configuring different areas. You must be logged in to view most of the articles, but you can bookmark the link for easy access. We are excited to have you on board!