ScopeStack integrates easily with Autotask to pull opportunities into our platform, making it easy to create Projects.
Configuring Autotask
The first step is creating an API User in AutoTask and using the credentials below to configure your integration. For more information on creating an AutoTask API User, visit the online documentation.
Here's our quick summary of the details here.
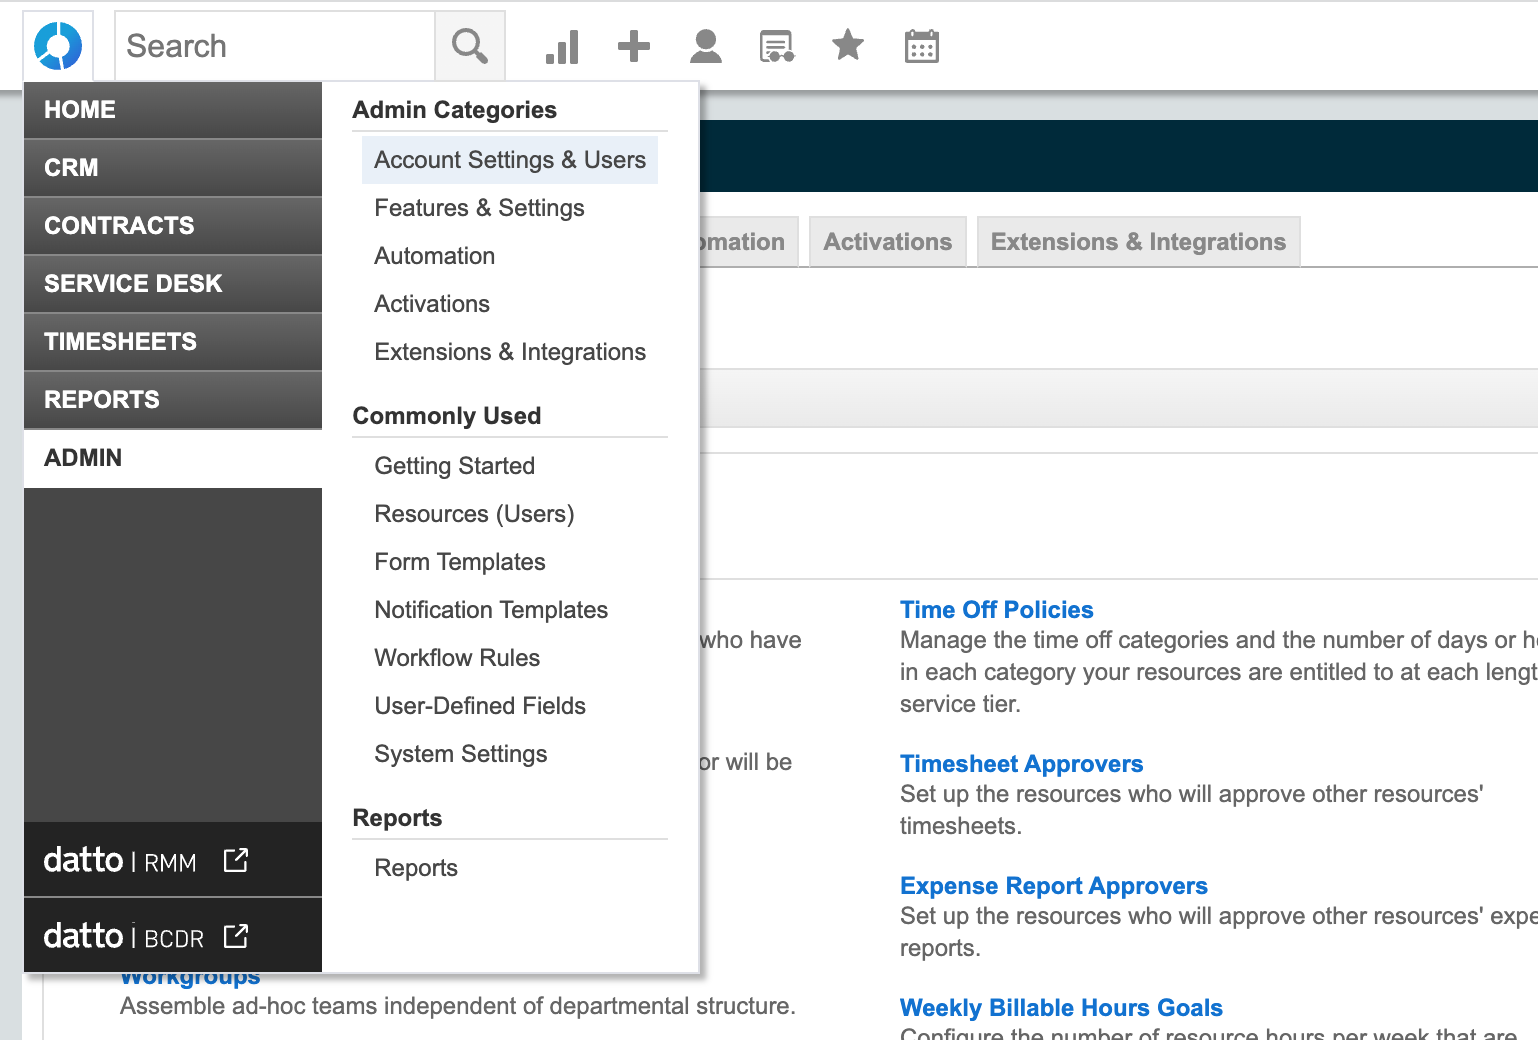
Navigate to Admin > Account Settings & Users.
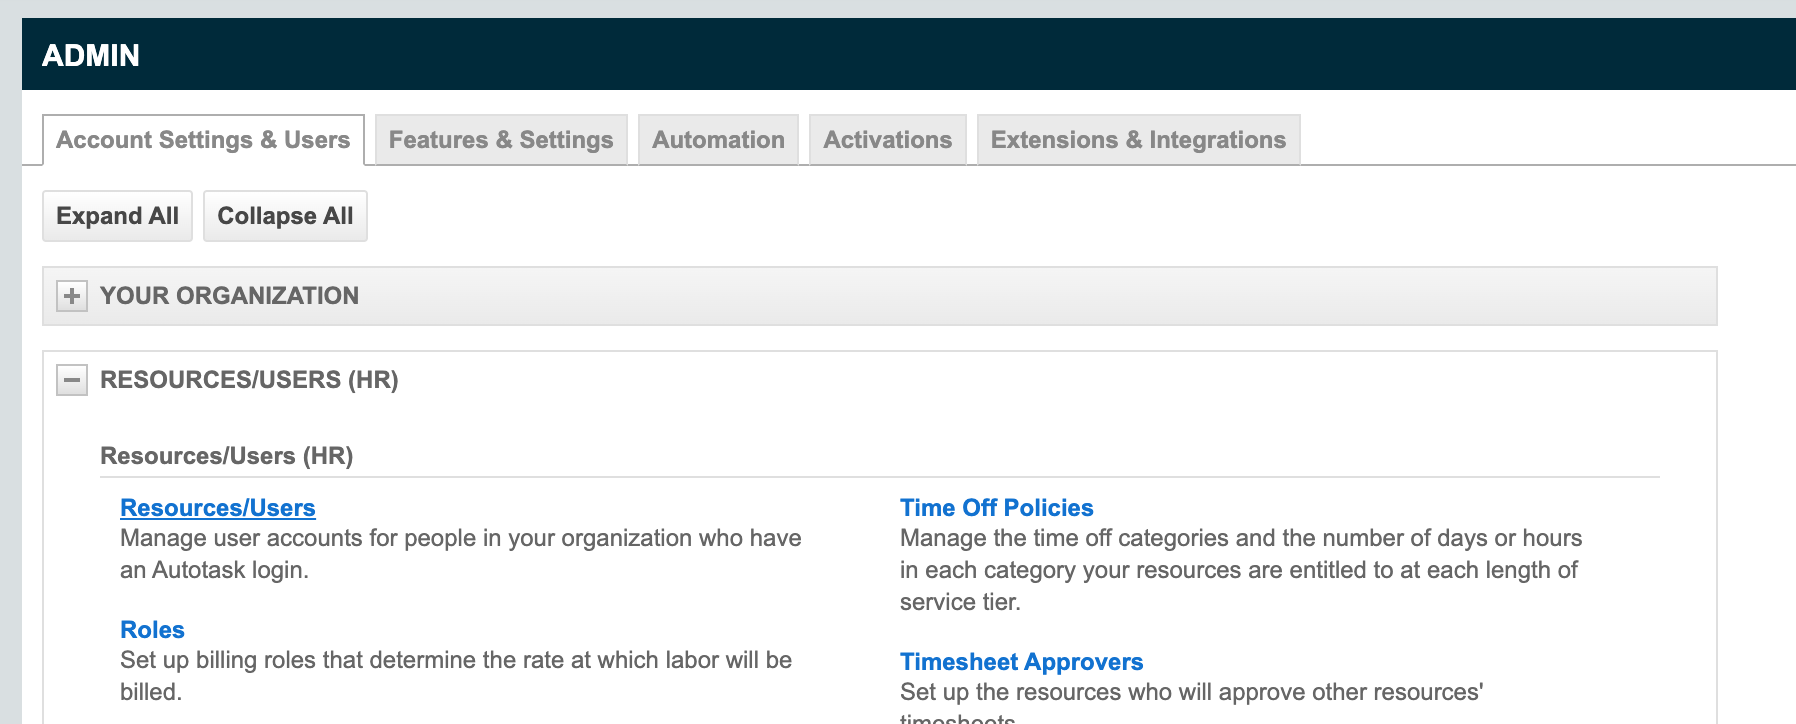
Expand the Resources/Users (HR) section, and click on Resources/Users.

Click the extra context menu option next to the New button and New API User.
Here you can complete some essential information about the API User. You can fill out the Required First Name and Last Name, Email Address, Primary Internal Location fields, and other required fields in your instance of Autotask.

In the Credentials section, click the Generate Key and Generate Secret buttons to create those values. You can note them as you will later input these fields into ScopeStack.
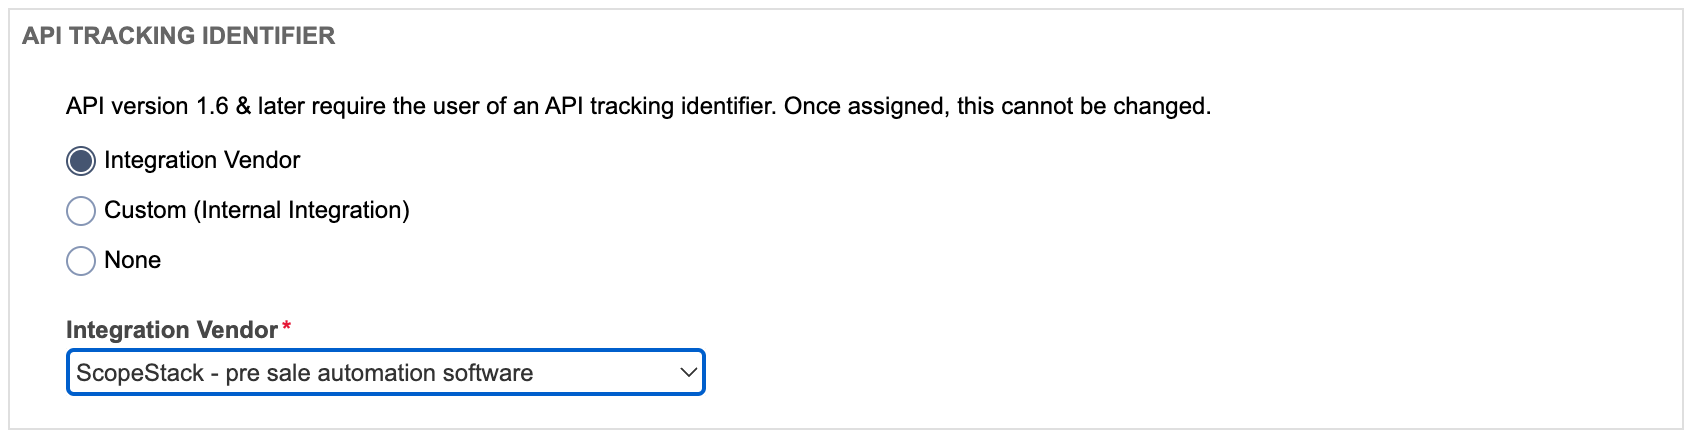
In the API Tracking Identifier section, select Integration Vendor.
From the Integration Vendor dropdown, select ScopeStack.
Setup in ScopeStack
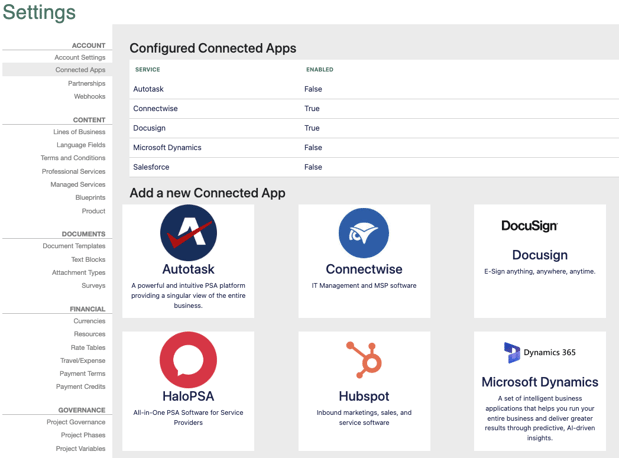
You're now ready to input the information into the ScopeStack Connected Apps page:
From the Settings / Connected Apps page, click the Autotask tile
You will then be navigated to the setup page
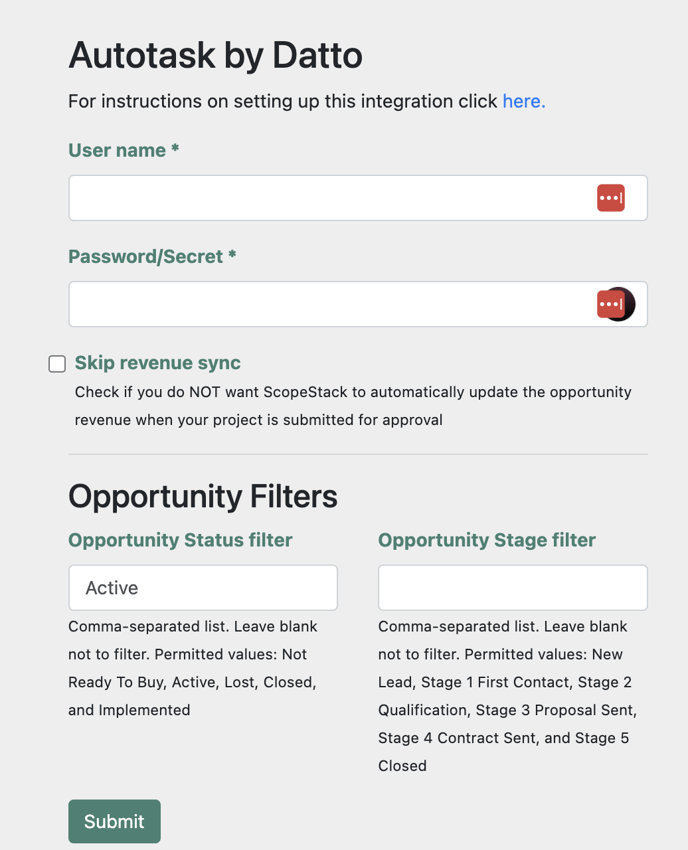
You can fill in the values as follows:
-
Username: This is the Username/Key value from the API user setup page.
-
Password/Secret: This is the password/secret value from the API user setup page.
- Skip revenue sync: By default, ScopeStack will automatically update the Opportunity object's revenue when the project is submitted for approval. You can check this option to skip that.
- Opportunity Filters: You can use these filters to present only projects of specific statuses and stages. By default, we filter for Active Status projects.
After completing the fields, press the save button. You will see the message "Autotask Configuration saved" in the green banner at the platform's top.
You can now click the Enable toggle to turn on the integration on the left menu of integration options, and your CRM Opportunities will sync in at the next sync interval.
Did this answer your question?